Introduction
WordPress is one of the most flexible content management systems available for building websites, blogs, online stores, business portals, and other digital platforms. One of the main reasons for its flexibility is its plugin system, which allows website owners and developers to extend WordPress functionality without modifying the core software.
Whether you want to add a contact form, create a custom dashboard widget, display information on your website, integrate an external API, or develop a completely new feature, WordPress plugins provide a structured way to accomplish these tasks.
Many beginners believe that creating a WordPress plugin requires advanced programming knowledge or complicated development tools. However, creating a basic plugin from scratch is relatively straightforward if you understand a few essential concepts, including PHP, WordPress hooks, plugin headers, and the WordPress directory structure.
You do not need to build a complicated application for your first project. A simple plugin that displays a custom message on your website is an excellent starting point. Once you understand how WordPress loads plugins and executes their code, you can gradually develop more advanced functionality.
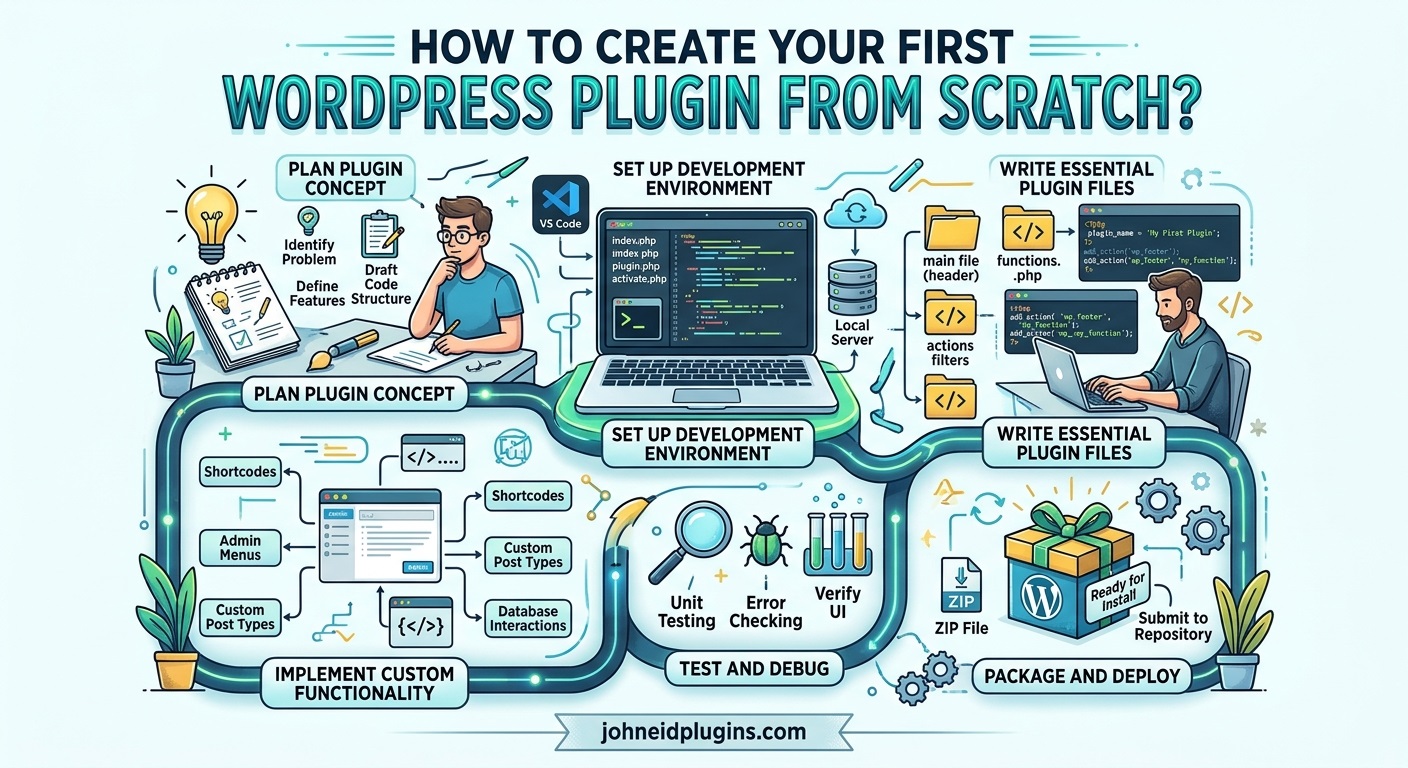
This tutorial explains how to create your first WordPress plugin from scratch, even if you have limited experience with WordPress development. You will learn how to prepare a development environment, create the plugin directory, write the main PHP file, register hooks, add frontend functionality, create settings, and test your plugin.
The objective is to help you understand the complete plugin development process rather than simply copy and paste code without knowing how it works.
By the end of this guide, you will have created a working WordPress plugin that you can install, activate, customize, and expand with additional features.
1. Understand What a WordPress Plugin Is
Before writing your first plugin, it is important to understand what a WordPress plugin does.
A WordPress plugin is a collection of PHP files, scripts, stylesheets, and other resources that add or modify functionality on a WordPress website.
WordPress provides a plugin architecture that allows developers to extend the platform without directly changing its core files.
For example, you can develop plugins to:
- Create custom contact forms.
- Display image sliders and galleries.
- Add custom post types.
- Create website management tools.
- Integrate payment gateways.
- Connect WordPress to external APIs.
- Add custom dashboard widgets.
- Improve website security.
- Manage SEO-related functionality.
- Create product comparison systems.
- Build membership and subscription features.
- Generate custom reports.
The biggest advantage of plugin development is that functionality can remain separate from the active WordPress theme.
For example, if you add a custom feature directly to your theme’s functions.php file, that functionality may stop working when you change themes.
If you develop the same functionality as a standalone plugin, it can continue working after changing your website’s theme, provided the plugin remains compatible.
This separation makes plugins useful for reusable functionality and long-term website maintenance.
2. Prepare Your WordPress Plugin Development Environment
Before creating your first plugin, prepare a development environment where you can write and test PHP code safely.
Developing directly on a live website is not recommended, especially when you are learning.
A programming mistake can cause PHP errors, display warnings, or temporarily make your website inaccessible.
Choose a Local WordPress Installation
You can install WordPress on your computer using local development software.
Some commonly used options include:
- Local – Provides a convenient environment for developing WordPress websites locally.
- XAMPP – Provides Apache, MariaDB, PHP, and other development components.
- WampServer – A Windows-based local development environment.
- MAMP – Provides a local environment for PHP and database development.
For beginners, Local is a convenient option because it simplifies WordPress installation and website management.
Choose a Code Editor
You also need a text editor or code editor to create and modify PHP files.
Popular options include:
A code editor makes it easier to identify syntax errors, organize files, and understand PHP code.
Understand the WordPress Plugin Directory
Every standard WordPress installation contains a directory named:
wp-content/plugins/This directory stores installed WordPress plugins.
Each plugin generally has its own folder.
For example:
wp-content/
    plugins/
        hello-world-plugin/
            hello-world-plugin.php
You will create your first plugin inside this directory.
3. Create Your First WordPress Plugin Folder
The first practical step is creating a dedicated folder for your plugin.
Navigate to your WordPress installation directory.
Open:
wp-content/plugins/Create a new folder named:
my-first-pluginYour folder structure should now look like this:
wp-content/
    plugins/
        my-first-plugin/
Using a separate directory helps organize your plugin files.
As your project becomes more advanced, you can add additional PHP files, CSS stylesheets, JavaScript files, images, and documentation.
For now, one PHP file is sufficient.
4. Create the Main PHP File
Inside the my-first-plugin directory, create a PHP file named:
my-first-plugin.phpThe main plugin file contains the plugin header and the initial code WordPress needs to recognize your extension.
Add the following code:
<?php
/**
 * Plugin Name: My First WordPress Plugin
 * Plugin URI: https://example.com/
 * Description: A simple beginner-friendly WordPress plugin.
 * Version: 1.0.0
 * Author: Your Name
 * Author URI: https://example.com/
 * License: GPL-2.0-or-later
 * License URI: https://www.gnu.org/licenses/gpl-2.0.html
 * Text Domain: my-first-plugin
 */

if ( ! defined( 'ABSPATH' ) ) {
    exit;
}
Save the file.
Congratulations! You have created the basic structure of your first WordPress plugin.
Understand the Plugin Header
The information at the beginning of the file is called the plugin header.
WordPress reads this information to identify your plugin in the administration dashboard.
Here is what each field means:
| Header field | Purpose |
|---|---|
| Plugin Name | Displays the plugin name |
| Plugin URI | Links to the plugin website |
| Description | Explains what the plugin does |
| Version | Identifies the current plugin version |
| Author | Identifies the developer |
| Author URI | Links to the developer website |
| License | Specifies the plugin license |
| License URI | Provides the license information |
| Text Domain | Identifies the translation domain |
The ABSPATH check prevents the PHP file from being accessed directly outside the WordPress environment.
It is a useful basic security measure for WordPress plugins.
For additional information, review the official WordPress plugin header documentation.
5. Add Your First WordPress Plugin Function
Now that WordPress can recognize your plugin, it is time to add some functionality.
For your first project, create a function that displays a welcome message on your website.
Add the following code below the existing plugin header:
function mfp_display_welcome_message() {

    echo '<p>Welcome to my first WordPress plugin!</p>';

}
This function is responsible for displaying a simple paragraph.
However, defining a function does not automatically execute it.
You need to connect the function to an appropriate WordPress hook.
This is where WordPress actions become important.
Understand WordPress Actions
Actions allow developers to execute custom functions at specific points during WordPress execution.
For example, WordPress provides actions that run when:
- The website header is loaded.
- The footer is displayed.
- The administration dashboard is initialized.
- A post is published.
- A plugin is activated.
- WordPress initializes.
To display your welcome message in the website footer, use the wp_footer action.
Add:
add_action(
    'wp_footer',
    'mfp_display_welcome_message'
);
Your complete plugin file should now look like this:
<?php
/**
 * Plugin Name: My First WordPress Plugin
 * Description: A simple beginner-friendly WordPress plugin.
 * Version: 1.0.0
 * Author: Your Name
 * License: GPL-2.0-or-later
 */

if ( ! defined( 'ABSPATH' ) ) {
    exit;
}

function mfp_display_welcome_message() {

    echo '<p>Welcome to my first WordPress plugin!</p>';

}

add_action(
    'wp_footer',
    'mfp_display_welcome_message'
);
Save the file.
You have now created a basic functional WordPress plugin.
6. Activate Your First WordPress Plugin
Now that your plugin contains a valid header and a working function, you can activate it.
Follow these steps:
- Log in to your WordPress administration dashboard.
- Navigate to Plugins → Installed Plugins.
- Find My First WordPress Plugin.
- Click Activate.
- Open your website’s frontend.
- Scroll down to the footer.
You should see:
Expected result
Welcome to my first WordPress plugin!
This message is generated by your custom plugin.
If the message appears, your plugin is successfully running.
If it does not appear, check the following:
- Confirm that the plugin is activated.
- Make sure the PHP file is saved in the correct directory.
- Check that the function name matches the registered action callback.
- Confirm that your active theme calls
wp_footer()before the closing body tag. - Check your PHP error logs for syntax errors.
You can also use WordPress debugging tools to identify errors.
7. Understand WordPress Filters
You have already learned how to use an action hook. Another important concept in WordPress plugin development is the filter hook.
Actions and filters both allow plugins to interact with WordPress, but they serve different purposes.
Actions execute functions at specific points during WordPress execution.
Filters modify data before WordPress uses or displays it.
For example, you can use the the_content filter to modify the content of published posts.
Add the following function to your plugin:
function mfp_add_content_message( $content ) {

    if ( is_single() && is_main_query() ) {

        $message = '<p>Thank you for reading this article!</p>';

        $content .= $message;

    }

    return $content;
}

add_filter(
    'the_content',
    'mfp_add_content_message'
);
This function adds a message after the main content of individual posts.
Let’s understand the important elements.
$contentcontains the original post content.is_single()checks whether the current page displays an individual post.is_main_query()helps ensure the modification applies to the main WordPress query.$content .= $messageappends the additional message.return $contentreturns the modified content.
This is a simple example of how plugins can modify existing WordPress functionality without changing core files.
You can learn more about WordPress actions and filters in the official developer documentation.
8. Create a Shortcode for Your Plugin
A shortcode is a useful way to display plugin functionality inside posts, pages, and supported content areas.
Instead of automatically displaying a message in the footer, you can allow website administrators to choose where the message appears.
For example, a shortcode could look like this:
[my_first_message]To create it, add the following function:
function mfp_message_shortcode() {

    return '<div class="mfp-message">
        Welcome to my first WordPress plugin!
    </div>';

}

add_shortcode(
    'my_first_message',
    'mfp_message_shortcode'
);
Save your plugin file.
Now open a WordPress page or post and insert:
[my_first_message]Publish or update the page.
The shortcode will display your custom message wherever it is inserted.
Why Are Shortcodes Useful?
Shortcodes make plugins more flexible because website administrators can control where specific functionality appears.
You can use shortcodes to:
- Display contact forms.
- Create image galleries.
- Show recent posts.
- Display product information.
- Generate custom buttons.
- Embed external content.
- Display membership information.
- Create pricing tables.
For more information, read the official WordPress Shortcode API documentation.
9. Add Custom CSS to Your WordPress Plugin
A plugin does not have to contain PHP code only.
You can also include CSS and JavaScript files to control its frontend appearance and behavior.
Let’s improve the appearance of your welcome message.
Inside your plugin directory, create a new folder:
assetsInside this folder, create:
style.cssYour directory structure should now look like this:
my-first-plugin/
    my-first-plugin.php
    assets/
        style.css
Add the following CSS:
.mfp-message {
    background: #f1f5f9;
    border-left: 4px solid #2271b1;
    padding: 15px;
    margin: 20px 0;
    color: #222;
    font-size: 16px;
    border-radius: 4px;
}
Now you need to load the stylesheet correctly.
Add this function to your main plugin file:
function mfp_enqueue_styles() {

    wp_enqueue_style(
        'mfp-style',
        plugin_dir_url( __FILE__ ) . 'assets/style.css',
        array(),
        '1.0.0'
    );

}

add_action(
    'wp_enqueue_scripts',
    'mfp_enqueue_styles'
);
The wp_enqueue_style() function tells WordPress to load your stylesheet through its standard asset-loading system.
This is preferable to directly printing CSS inside your plugin’s PHP file.
You can learn more about including CSS and JavaScript in WordPress.
10. Create a Simple Plugin Settings Page
Once you understand basic plugin functionality, the next step is learning how to create an administration settings page.
A settings page allows website administrators to configure plugin behavior through the WordPress dashboard instead of editing PHP files.
For example, you could allow administrators to change the welcome message.
WordPress provides the Settings API to simplify this process.
Register a Plugin Setting
Add the following code to your main plugin file:
function mfp_register_settings() {

    register_setting(
        'mfp_settings_group',
        'mfp_welcome_text',
        array(
            'sanitize_callback' => 'sanitize_text_field'
        )
    );

}

add_action(
    'admin_init',
    'mfp_register_settings'
);
This registers a setting named mfp_welcome_text.
The sanitize_text_field() function removes unwanted characters and sanitizes text input before it is saved.
Create the Administration Menu
Next, create a function that adds your settings page to the WordPress dashboard.
function mfp_add_admin_menu() {

    add_options_page(
        'My First Plugin Settings',
        'My First Plugin',
        'manage_options',
        'my-first-plugin',
        'mfp_settings_page'
    );

}

add_action(
    'admin_menu',
    'mfp_add_admin_menu'
);
This creates a settings menu under:
Settings → My First Plugin
The manage_options capability ensures that only users with the appropriate administrative permissions can access the settings page.
Display the Settings Form
Add the following function:
function mfp_settings_page() {

    if ( ! current_user_can( 'manage_options' ) ) {
        return;
    }

    $welcome_text = get_option(
        'mfp_welcome_text',
        'Welcome to my first WordPress plugin!'
    );
    ?>

    <div class="wrap">

        <h1>My First Plugin Settings</h1>

        <form method="post" action="options.php">

            <?php
            settings_fields( 'mfp_settings_group' );
            ?>

            <table class="form-table">

                <tr>
                    <th>
                        <label for="mfp_welcome_text">
                            Welcome Message
                        </label>
                    </th>

                    <td>
                        <input
                            type="text"
                            id="mfp_welcome_text"
                            name="mfp_welcome_text"
                            value="<?php echo esc_attr( $welcome_text ); ?>"
                            class="regular-text"
                        >
                    </td>
                </tr>

            </table>

            <?php submit_button(); ?>

        </form>

    </div>

    <?php
}
This creates a simple administration form.
The form uses WordPress’s Settings API to save the submitted value.
Notice the use of esc_attr() when displaying the saved value. Escaping output is an important security practice.
Display the Saved Message
Now update your shortcode function:
function mfp_message_shortcode() {

    $message = get_option(
        'mfp_welcome_text',
        'Welcome to my first WordPress plugin!'
    );

    return '<div class="mfp-message">' .
        esc_html( $message ) .
        '</div>';

}

add_shortcode(
    'my_first_message',
    'mfp_message_shortcode'
);
You can now change the message from your WordPress administration dashboard.
This small project introduces you to several important WordPress development concepts:
- Creating plugin settings.
- Registering options.
- Building administration menus.
- Saving configuration values.
- Sanitizing user input.
- Escaping frontend output.
For more advanced settings functionality, consult the WordPress Settings API documentation.
11. Follow WordPress Plugin Security Best Practices
Security should be considered from the beginning of plugin development.
Even a small plugin can introduce vulnerabilities if it processes user input incorrectly or displays untrusted data without proper escaping.
Here are some important practices to follow.
Use Unique Function Prefixes
WordPress websites can have many plugins active simultaneously.
If two plugins use the same PHP function name, they can cause a fatal error because PHP does not allow ordinary functions to be declared twice.
Use a unique prefix for your plugin functions, options, and other identifiers.
In our example, we use:
mfp_This reduces the likelihood of naming conflicts.
Sanitize User Input
Whenever your plugin accepts information from a form, URL, or external source, sanitize and validate that information.
Useful WordPress functions include:
sanitize_text_field()sanitize_email()sanitize_key()absint()esc_url_raw()
Choose the function according to the type of data being processed.
Escape Output
Before displaying dynamic information, use appropriate escaping functions.
Examples include:
esc_html()for plain text.esc_attr()for HTML attributes.esc_url()for URLs.wp_kses_post()for permitted post HTML.
Sanitization and escaping serve different purposes. Sanitize incoming data and escape it when displaying it.
Check User Permissions
Before allowing an administrator to change plugin settings, verify that the current user has the required capability.
For example:
if ( ! current_user_can( 'manage_options' ) ) {
    return;
}
Do not assume that every logged-in user has administrative permissions.
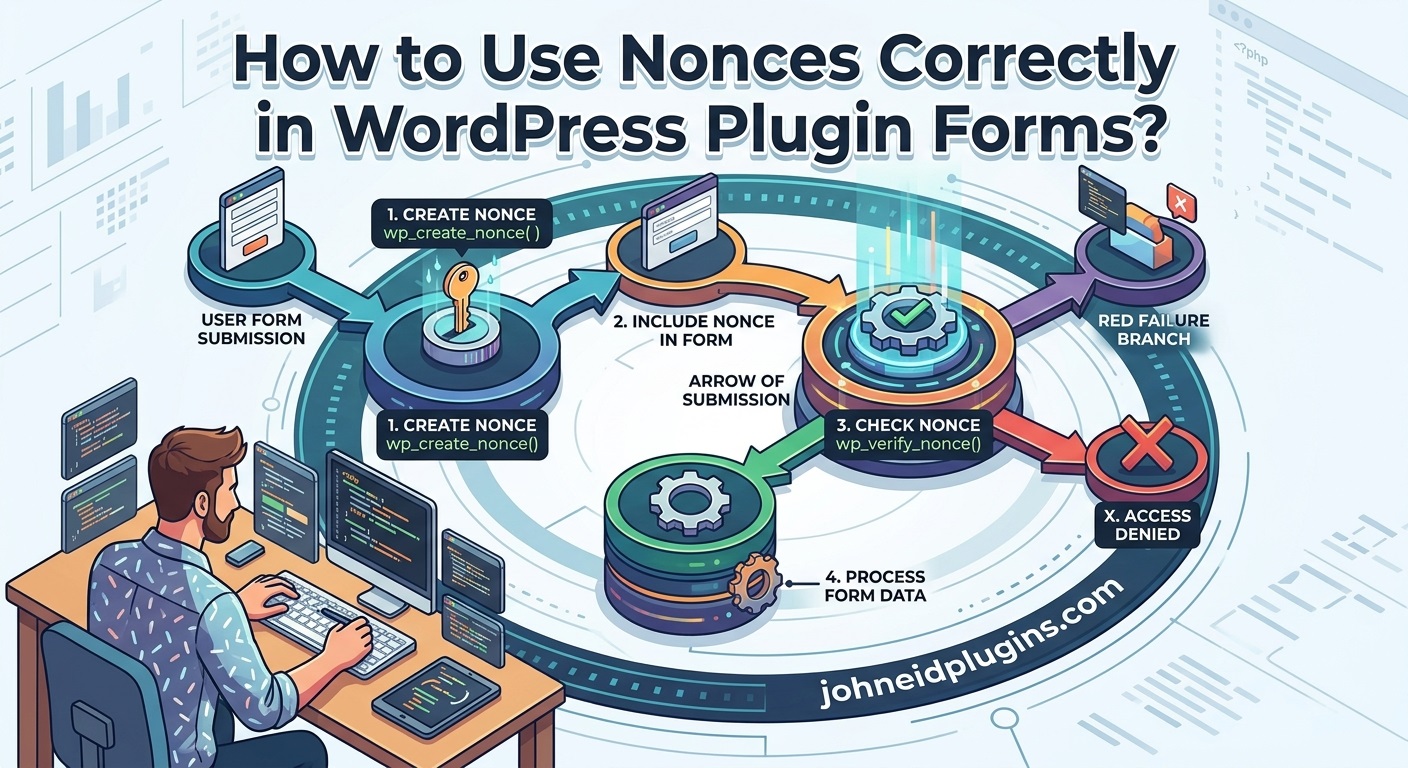
Use Nonces for Custom Form Requests
WordPress nonces help protect forms and requests against certain types of unwanted or forged actions.
For custom forms that process requests directly, use functions such as:
wp_nonce_field();And verify submitted nonces using:
check_admin_referer();Nonces are not substitutes for permission checks or input validation.
Read the official WordPress Plugin Security Handbook before developing plugins that process sensitive information.
12. Test Your WordPress Plugin Before Publishing
Testing is an essential part of plugin development.
A plugin that works on your local installation may behave differently on another website because of differences in WordPress versions, PHP versions, themes, and other installed plugins.
Before publishing your plugin, test the following areas.
Test Plugin Activation
Activate and deactivate your plugin several times.
Check whether:
- The plugin activates without errors.
- The settings page appears correctly.
- Shortcodes work.
- Frontend messages display correctly.
- Existing website functionality remains unaffected.
Test Plugin Compatibility
Test your plugin with different WordPress themes and commonly used plugins.
Pay attention to possible conflicts involving:
- SEO plugins.
- Caching plugins.
- Page builders.
- Security plugins.
- WooCommerce.
- Contact form plugins.
Check PHP Errors
Enable WordPress debugging on your development website.
In wp-config.php, you can configure:
define( 'WP_DEBUG', true );

define( 'WP_DEBUG_LOG', true );

define( 'WP_DEBUG_DISPLAY', false );
This configuration enables debugging and logs relevant errors without displaying them to website visitors.
Check the following file:
wp-content/debug.logDisable debugging when you finish testing on a production website.
Test Different PHP Versions
If possible, test your plugin against the PHP versions you intend to support.
Avoid using outdated PHP functions and verify that your code follows the requirements specified in your plugin header.
13. Organize Your Plugin Files Professionally
Your first plugin can work with one PHP file. However, larger plugins should use a structured directory.
As you add more functionality, separating different components makes development and maintenance easier.
A professional plugin structure might look like this:
my-first-plugin/
│
├── my-first-plugin.php
│
├── includes/
│   ├── functions.php
│   ├── settings.php
│   └── shortcode.php
│
├── admin/
│   └── admin-functions.php
│
├── public/
│   └── frontend-functions.php
│
├── assets/
│   ├── css/
│   │   └── style.css
│   │
│   └── js/
│       └── script.js
│
├── languages/
│
├── uninstall.php
│
└── readme.txt
Each directory has a specific purpose.
| Directory/file | Purpose |
|---|---|
| Main PHP file | Initializes the plugin |
| includes | Contains shared functionality |
| admin | Contains dashboard functionality |
| public | Contains frontend functionality |
| assets/css | Stores stylesheets |
| assets/js | Stores JavaScript |
| languages | Stores translation files |
| uninstall.php | Handles plugin data cleanup |
| readme.txt | Provides installation and usage documentation |
You do not need to create every directory for a small plugin.
Start with the files you actually need and expand the structure as your project grows.
14. Create an Installable ZIP File
Once your plugin is working correctly, you can package it into an installable ZIP file.
This allows you to install your plugin on other WordPress websites without manually copying its files.
Your ZIP file should contain the plugin folder:
my-first-plugin.zip
    my-first-plugin/
        my-first-plugin.php
        assets/
            style.css
To install it:
- Open your WordPress administration dashboard.
- Navigate to Plugins → Add Plugin.
- Click Upload Plugin.
- Select your ZIP file.
- Click Install Now.
- Activate the plugin.
Your custom plugin is now installed.
You can also distribute it privately to clients or publish it through the WordPress Plugin Directory after meeting the applicable submission requirements.
Review the WordPress Plugin Directory guidelines before submitting a public plugin.
15. Learn What to Develop After Your First Plugin
Once you understand basic plugin development, you can start building more useful WordPress extensions.
Here are some practical project ideas.
| Plugin idea | Functionality |
|---|---|
| Image Slider Plugin | Displays responsive image sliders |
| Logo Carousel Plugin | Displays rotating company logos |
| Contact Form Plugin | Collects website visitor inquiries |
| Recent Posts Plugin | Displays selected recent articles |
| Custom Dashboard Widget | Adds information to the admin dashboard |
| SEO Helper Plugin | Adds selected SEO management features |
| API Integration Plugin | Connects WordPress to external services |
| CSV Import Plugin | Imports structured data |
| Website Backup Plugin | Helps manage website backups |
| Custom Post Type Plugin | Creates specialized content types |
Start with a small project and gradually introduce advanced functionality.
For example, after creating a simple message plugin, you could develop a complete image slider extension with an administration settings page, image upload functionality, shortcode support, responsive layouts, and JavaScript-based transitions.
The important thing is to understand the underlying WordPress APIs before building increasingly complicated features.
Frequently Asked Questions
1. Can I create a WordPress plugin without advanced programming knowledge?
Yes. You can create a basic WordPress plugin with fundamental PHP knowledge. Understanding plugin headers, functions, actions, filters, and shortcodes is sufficient to begin developing simple extensions.
2. Which programming language is used to develop WordPress plugins?
PHP is the primary server-side programming language used for WordPress plugin development. Developers can also use JavaScript, CSS, HTML, and SQL depending on the plugin’s functionality.
3. Where should I create my first WordPress plugin?
Create your plugin inside the wp-content/plugins/ directory of your WordPress installation. Give it a dedicated folder and create a main PHP file containing the required plugin header.
4. Can I create a WordPress plugin using Notepad++?
Yes. You can write WordPress plugin code using Notepad++, Visual Studio Code, PhpStorm, or another text editor that supports PHP files. A dedicated code editor provides additional features such as syntax highlighting and error detection.
5. Do I need a database to create a WordPress plugin?
Not necessarily. A simple plugin that displays a message may not need database storage. However, plugins that save settings, user information, custom content, or other persistent data may use the WordPress Options API, Metadata API, or database tables.
6. How can I add a settings page to my WordPress plugin?
You can create an administration page using add_options_page() or add_menu_page(). The WordPress Settings API provides functions for registering settings, displaying fields, and saving configuration values.
7. Can I sell a WordPress plugin that I develop myself?
Yes. You can develop and sell WordPress plugins through your own website or suitable marketplaces, provided you follow applicable licensing, copyright, and distribution requirements.
8. How do I convert my WordPress plugin into a ZIP file?
Place all plugin files inside one main directory and compress that directory into a ZIP archive. You can then upload the ZIP through the WordPress plugin installation screen.
9. How do I prevent conflicts between my plugin and other plugins?
Use unique prefixes for PHP functions, classes, constants, and database options. Follow WordPress coding standards, use standard APIs, avoid unnecessary global changes, and test your plugin with commonly used themes and extensions.
10. Can I publish my first WordPress plugin on WordPress.org?
Yes. You can submit your plugin for review through the WordPress Plugin Directory submission process. Your plugin must satisfy the directory’s requirements, including security, licensing, documentation, and code-quality expectations.
Conclusion
Creating your first WordPress plugin from scratch is an excellent way to understand how WordPress works and how its functionality can be extended.
You do not need to begin with a complicated project. A simple plugin containing a PHP header, a few functions, and WordPress hooks can teach you the essential principles of plugin development.
As you progress, you can learn to create shortcodes, administration settings pages, custom post types, API integrations, frontend interfaces, and more advanced features.
Always follow WordPress development standards, use secure coding practices, test your code before distribution, and maintain compatibility with supported WordPress and PHP versions.
Most importantly, develop plugins that solve genuine problems for website owners rather than adding unnecessary functionality.
With consistent practice, you can progress from creating a basic welcome message plugin to developing complete WordPress extensions that can be installed, customized, distributed, and sold.
If you want to become a WordPress plugin developer, start building small projects today. Each plugin you create will improve your understanding of PHP, WordPress architecture, and professional software development.