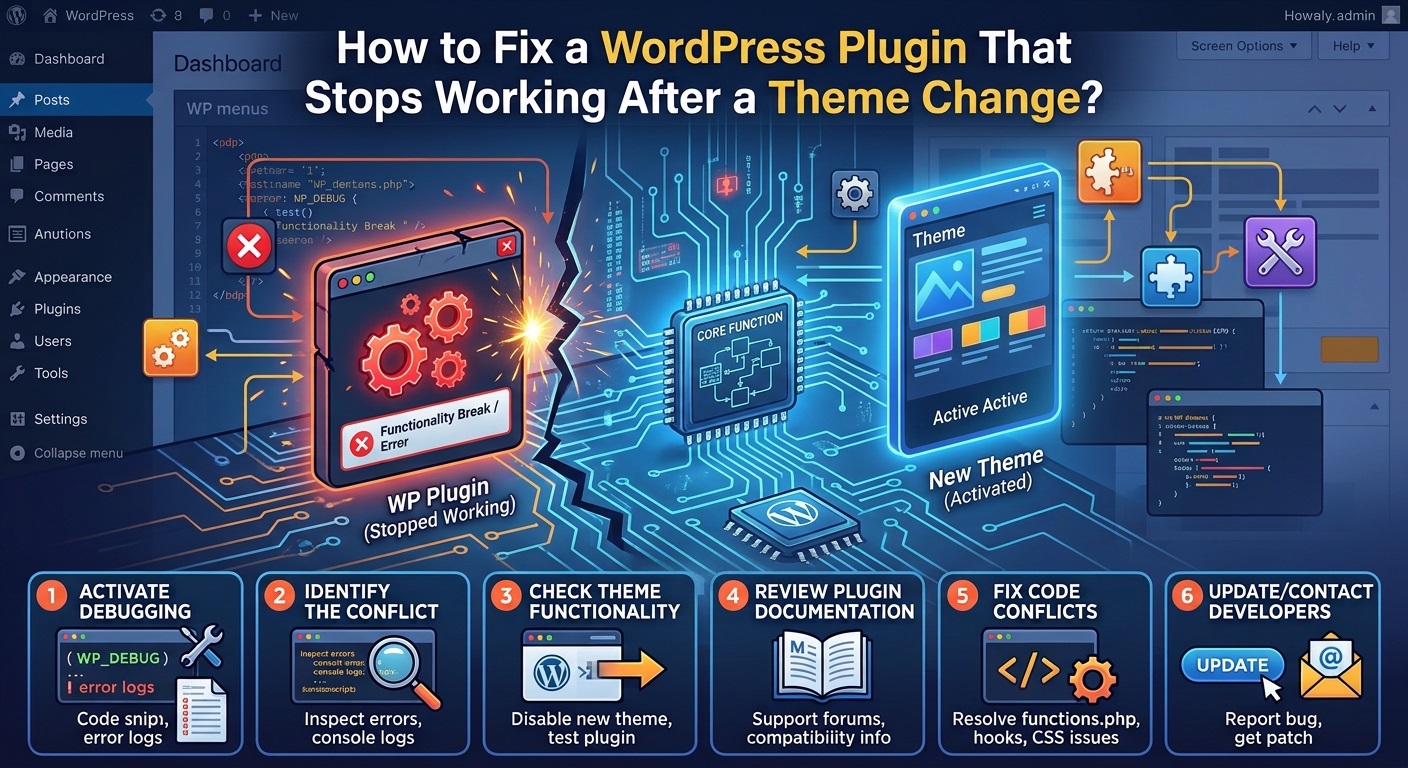
Changing a WordPress theme is a common way to improve a website’s appearance, performance, and user experience. Website owners frequently switch themes to get a modern design, introduce new layouts, improve mobile responsiveness, or access additional customization options. However, sometimes a theme change creates unexpected problems, particularly when previously installed WordPress plugins stop working correctly.
You might notice that an image slider disappears, a contact form stops submitting, a shortcode displays as plain text, a custom widget is missing, or a plugin’s frontend functionality no longer works. In some cases, the plugin remains activated in the WordPress dashboard but its features are no longer visible on the website.
If you are experiencing this problem, you are not alone. WordPress plugins and themes interact with each other through PHP functions, JavaScript files, CSS stylesheets, hooks, filters, templates, widgets, and other application components. A change in the active theme can affect these interactions and prevent certain plugin features from functioning as expected.
Fortunately, most theme-related plugin problems can be diagnosed and resolved without rebuilding your website or permanently replacing your plugins.
In this guide, you will learn how to fix a WordPress plugin that stops working after a theme change, identify common compatibility problems, troubleshoot missing functionality, and prevent similar issues when changing themes in the future.
Why Does a WordPress Plugin Stop Working After Changing a Theme?
WordPress uses a flexible architecture that allows plugins and themes to extend website functionality independently. However, they are not completely isolated from each other.
A plugin may depend on specific theme features, frontend elements, widget areas, styling rules, JavaScript libraries, or template structures. When you activate a different theme, some of these dependencies may no longer be available.
Here are some common reasons a WordPress plugin might stop working after a theme change.
1. Theme and Plugin Compatibility Issues
Some plugins are developed to work with a wide range of WordPress themes, while others depend on particular theme features or design structures.
For example, a plugin that displays a slider inside a theme-specific homepage section might stop displaying its output after switching to a theme that does not provide the same section or template.
The plugin itself may still be functioning correctly, but the new theme does not provide the environment expected by the plugin.
2. Missing Widget Areas
Many WordPress themes provide dedicated widget areas in their headers, footers, sidebars, and homepage layouts.
If you previously added a plugin widget to one of these locations, changing themes may cause the widget to disappear from the frontend.
The new theme might use different widget areas or might not support the same sidebar locations.
This is particularly common with weather widgets, social media feeds, recent posts, advertisements, and custom content widgets.
3. Missing Shortcode Support
WordPress shortcodes allow plugins to insert dynamic content into posts, pages, and other supported content areas.
For example, a slider plugin might provide a shortcode such as:
[example_slider id="123"]
If the shortcode was generated by a plugin, changing themes should not normally remove the plugin’s shortcode functionality.
However, some themes provide their own shortcodes or custom content elements. If your previous theme registered a shortcode or provided a custom page builder element, that functionality may disappear after changing themes.
It is important to determine whether the shortcode belongs to the plugin or the previous theme.
4. JavaScript Conflicts
Modern WordPress plugins frequently use JavaScript to provide interactive functionality.
Examples include:
- Image sliders and carousels.
- Dropdown menus and navigation systems.
- Popup windows.
- AJAX-based forms.
- Product filters.
- Tabs and accordions.
- Interactive maps.
A new theme may load a different JavaScript library, change script loading order, or introduce an incompatible script.
As a result, the plugin’s JavaScript may fail to execute correctly.
5. CSS Styling Conflicts
Themes control the visual presentation of WordPress websites through CSS.
A new theme may introduce different CSS rules for buttons, images, containers, headings, forms, and other frontend elements.
These styles can override the appearance of plugin-generated content.
For example, a plugin’s image slider may still generate its HTML correctly, but the new theme’s CSS might apply unexpected dimensions, hide overflow, or change image positioning.
Consequently, the slider may appear broken even though its underlying functionality is working.
6. Missing Theme-Specific Functions
Some plugins rely on functions, hooks, or template structures provided by a particular theme.
If the previous theme registered custom functions or action hooks, a plugin might have been using those features to display content.
After changing themes, these functions may no longer exist.
This can result in PHP errors, missing content, or incomplete frontend functionality.
How to Fix a WordPress Plugin That Stops Working After a Theme Change
Before making significant changes, create a complete backup of your WordPress files and database. If possible, perform troubleshooting on a staging website rather than experimenting directly on a live website.
Follow these steps to identify and resolve the problem.
Step 1: Confirm That the Plugin Is Still Activated
Start with the simplest possible check.
Sometimes a plugin may become deactivated during maintenance, troubleshooting, or other website changes.
To verify its activation status:
- Log in to your WordPress administration dashboard.
- Navigate to Plugins > Installed Plugins.
- Locate the plugin that is no longer working.
- Check whether its status is Active.
- If it is inactive, click Activate.
- Visit the relevant frontend page and test its functionality.
If the plugin is already activated, continue to the next step.
Do not immediately uninstall and reinstall the plugin. Your existing plugin settings and stored information may be important.
Step 2: Check Whether the Plugin Supports the New Theme
Visit the plugin developer’s official website or documentation.
Look for information about:
- Supported WordPress themes.
- Theme compatibility requirements.
- Required theme functions.
- Supported page builders.
- Frontend template requirements.
- Known compatibility issues.
Some plugins are designed to work with standard WordPress themes, while others require additional integration.
If the developer provides theme-specific installation instructions, follow them carefully.
You can also check the plugin’s support forum in the WordPress Plugin Directory.
Search for the plugin name along with terms such as:
- Theme compatibility.
- Plugin not working after theme change.
- Missing frontend functionality.
- Theme conflict.
- JavaScript conflict.
Other users may have experienced the same problem and found a solution.
Step 3: Clear WordPress, Browser, and Server Cache
Caching problems can make it appear that a plugin is not working after a theme change.
WordPress websites may use several caching mechanisms, including:
- Browser caching.
- WordPress caching plugins.
- Hosting-level page caching.
- Server-side object caching.
- Content Delivery Network (CDN) caching.
These systems may continue serving older CSS, JavaScript, or HTML files after a theme change.
To resolve this problem:
- Open your WordPress caching plugin.
- Locate its cache-clearing option.
- Clear all cached website files.
- Clear your browser cache.
- Purge your CDN cache if applicable.
- Clear server-level cache through your hosting control panel.
- Open your website in a private browsing window.
- Test the affected plugin again.
If the plugin works after clearing the cache, the problem was probably related to outdated cached resources rather than an actual plugin failure.
For additional information, consult the WordPress troubleshooting documentation.
Step 4: Check the Plugin’s Widget Configuration
If your plugin uses widgets, changing themes may remove its previous widget placement.
For example, you might have displayed a social media feed in the old theme’s sidebar. After activating a new theme, the sidebar may have a different name or may not exist.
To resolve this:
- Navigate to Appearance > Widgets.
- Review the available widget areas.
- Locate the widget associated with your plugin.
- Check whether it is available in the inactive widgets section or another widget area.
- Add it to an appropriate location supported by your new theme.
- Save the widget configuration.
- Visit the frontend and verify its appearance.
If your new theme uses the WordPress Site Editor, navigate to Appearance > Editor and inspect the available templates and template parts.
You may need to add the appropriate widget or plugin block to a new template.
For more information, see the WordPress Widgets documentation.
Step 5: Verify Plugin Shortcodes
If a plugin uses shortcodes, confirm that the shortcode is still present on the relevant page.
Open the affected page in the WordPress editor.
Check the following:
- Is the shortcode still present?
- Is its spelling correct?
- Does it use the correct plugin-generated ID?
- Is it placed inside a supported content block?
- Does the plugin documentation specify any additional requirements?
If the shortcode belongs to the previous theme rather than the plugin, it may no longer be registered.
You should also check whether the new theme or page builder is displaying the shortcode as ordinary text instead of executing it.
If necessary, insert the shortcode using a dedicated Shortcode block in the WordPress block editor.
Save the page and test it again.
Step 6: Identify JavaScript Errors
JavaScript conflicts are among the most common reasons interactive plugins stop working after a theme change.
You can investigate these errors using your browser’s developer tools.
In Microsoft Edge or Google Chrome:
- Open the affected website page.
- Press F12.
- Select the Console tab.
- Refresh the page.
- Look for red error messages.
- Check whether the errors reference your plugin or theme.
Common JavaScript errors include:
Uncaught ReferenceErrorUncaught TypeErrorjQuery is not defined$(...).pluginFunction is not a functionFailed to load resourceCannot read properties of undefined
These messages can indicate missing JavaScript files, incorrect script loading order, incompatible libraries, or conflicts between frontend scripts.
For example, if a theme loads a script incorrectly or fails to load the required jQuery dependency, a plugin relying on that dependency may stop functioning.
You should also inspect the Network tab in developer tools.
Look for JavaScript files returning HTTP errors such as 404 or 403.
If a plugin’s required JavaScript file is missing, check its installation directory, enqueue configuration, and file permissions.
Developers can learn more about WordPress script management in the official JavaScript and script enqueue documentation.
Step 7: Check CSS Conflicts Between the Theme and Plugin
Sometimes a plugin appears broken because the new theme changes its frontend styling.
For example, a logo carousel might stop displaying correctly because the new theme applies unexpected image dimensions or container styles.
To investigate:
- Open the affected frontend page.
- Press F12.
- Select the Elements or Inspector tab.
- Locate the HTML element generated by the plugin.
- Examine its applied CSS properties.
- Check whether theme styles override plugin styles.
- Temporarily disable suspicious CSS declarations.
- Determine whether the plugin’s original appearance returns.
Pay particular attention to:
displayvisibilitypositionoverflowwidthheightmax-widthz-indexmarginpadding
If the issue is caused by a theme-specific CSS rule, a carefully targeted CSS adjustment may resolve it.
You can add custom CSS through Appearance > Customize > Additional CSS when the active theme supports the Customizer, or use the Site Editor’s styling options where available.
Avoid adding broad CSS rules that affect every image, button, or container across your website.
Instead, target the specific plugin container or CSS class.
Step 8: Test for a Theme and Plugin Conflict
If the previous steps do not resolve the issue, determine whether the new theme is directly conflicting with your plugin.
The safest approach is to perform controlled testing on a staging website.
Follow these instructions:
- Create a staging copy of your website.
- Keep the problematic plugin activated.
- Temporarily switch to a default WordPress theme.
- Test the plugin’s functionality.
- If the plugin works, reactivate your new theme.
- Deactivate other plugins temporarily.
- Reactivate the suspected plugin and test again.
- Reactivate the remaining plugins individually.
This process helps identify whether the problem originates from:
- The new theme itself.
- The plugin itself.
- A combination of the theme and plugin.
- Another plugin creating an additional conflict.
If the plugin works with a default theme but fails with the new theme, there is a strong indication of a theme-related compatibility issue.
You can also use the Health Check & Troubleshooting plugin to investigate conflicts using troubleshooting mode. This allows administrators to test different plugin and theme combinations without changing the experience of ordinary website visitors.
Step 9: Check PHP Errors and WordPress Debug Logs
Some theme changes introduce PHP compatibility problems.
For example, a plugin may call a function that was previously registered by the old theme. After changing themes, that function may become unavailable.
This can produce PHP warnings, notices, or fatal errors.
WordPress provides debugging options that help identify these problems.
If you have access to your website files, open wp-config.php and locate the debugging configuration.
You can use the following configuration for temporary error logging:
define( 'WP_DEBUG', true );
define( 'WP_DEBUG_LOG', true );
define( 'WP_DEBUG_DISPLAY', false );
If these constants already exist, edit their existing definitions rather than adding duplicate definitions.
Save the file and reproduce the problem.
Next, check:
wp-content/debug.log
Look for errors mentioning:
- The affected plugin.
- The active theme.
- Missing PHP functions.
- Undefined variables.
- Missing class declarations.
- Fatal PHP errors.
- Deprecated functions.
For example, an error such as Call to undefined function may indicate that the plugin depends on a function that is no longer available after the theme change.
Once debugging is complete, disable debugging on the production website and remove or securely store the log file. Debug logs may contain sensitive technical information.
Read the official WordPress debugging documentation for further guidance.
Step 10: Check Plugin and Theme Updates
Outdated software can cause compatibility problems.
A plugin that worked perfectly with your previous theme might not have been tested against the newer theme version.
Similarly, the theme developer may have released an update that fixes compatibility issues.
To check for updates:
- Navigate to Dashboard > Updates.
- Review available WordPress updates.
- Check whether your affected plugin has an update.
- Check whether your active theme has an update.
- Read the release notes before updating.
- Back up your website.
- Apply updates on a staging website first.
- Test the affected plugin.
Do not assume that installing every available update will automatically resolve the problem.
Review the plugin’s changelog and theme documentation to determine whether the update addresses the specific issue.
If an update introduces a new problem, consider using a reliable backup or an appropriate rollback procedure.
Step 11: Reinstall the Plugin If Its Files Are Damaged
Although changing themes should not normally damage plugin files, other maintenance operations or incomplete updates may leave plugin files missing or corrupted.
If you have ruled out theme compatibility, caching, and configuration problems, reinstalling the plugin may help.
Before reinstalling:
- Create a complete website backup.
- Export plugin settings if the plugin supports it.
- Check whether the plugin stores important information in its own database tables.
- Read the developer’s reinstallation instructions.
- Download the latest compatible plugin version from its official source.
Next:
- Navigate to Plugins > Installed Plugins.
- Deactivate the affected plugin.
- Remove it only after confirming that its settings and data are protected.
- Install a fresh copy.
- Activate the plugin.
- Restore or reconfigure its settings.
- Test its frontend functionality.
Important: Deleting a plugin can sometimes remove its stored data. Always check its documentation before uninstalling it.
Step 12: Reconfigure Theme-Dependent Plugin Settings
Some plugins provide additional settings for integrating their features with specific themes.
For example, an image slider plugin might provide options for:
- Container width.
- Responsive layout.
- Theme integration.
- Navigation controls.
- Image dimensions.
- Custom CSS classes.
- Header or footer placement.
After changing themes, revisit the plugin’s settings page.
Check whether its previous configuration is compatible with the new theme.
If the plugin provides a reset or regenerate option for its frontend assets, use it according to the developer’s instructions.
Save the settings again and test the plugin.
This step is particularly useful when a plugin remains active but its frontend output is missing or incorrectly positioned.
How to Fix a Plugin When the WordPress Dashboard Is Not Accessible
Sometimes a theme and plugin conflict can prevent the WordPress administration dashboard from loading.
You may encounter a blank screen, a critical error message, or a 500 Internal Server Error.
In this situation, you can use your hosting control panel or an FTP client to access the website files.
Deactivate the Problematic Plugin Through File Manager
- Log in to your hosting control panel.
- Open File Manager.
- Navigate to
public_html/wp-content/plugins/. - Locate the affected plugin folder.
- Rename the folder by adding
-disabledto its name. - Refresh your website.
- Check whether the WordPress dashboard becomes accessible.
WordPress will generally recognize that the plugin is unavailable and deactivate it.
Once the dashboard is accessible, you can investigate the conflict and restore the original folder name when appropriate.
Do not delete plugin files unless you have confirmed that you no longer need them.
Switch to a Default WordPress Theme
If the problem is caused by the active theme, you may need to temporarily switch to a default WordPress theme.
If you cannot access the dashboard, use your hosting control panel or FTP to inspect the theme directory.
The directory is usually:
wp-content/themes/
Ensure that a default WordPress theme is already installed before attempting this procedure.
If necessary, you can use the WordPress database to change the active theme, but database modifications should only be performed by someone familiar with WordPress database structures.
For more detailed instructions, consult the official WordPress common errors guide.
How to Prevent WordPress Plugin Problems When Changing Themes
Preventing compatibility problems is easier than repairing a broken website after a theme change.
Consider the following best practices before switching themes.
1. Create a Complete Website Backup
Always create a backup of your WordPress database and website files before making major changes.
A backup provides a recovery point if the new theme introduces unexpected problems.
Keep a copy somewhere separate from your hosting account.
2. Use a Staging Website
A staging website allows you to test a new theme without affecting your live visitors.
Install your intended theme on the staging copy and test all important plugins.
Check forms, sliders, galleries, navigation elements, payment features, and other essential functionality before publishing the changes.
3. Check Theme Compatibility Before Installation
Review the theme’s documentation, support information, and compatibility requirements.
If your website depends on specialized plugins, verify that the new theme supports their integration requirements.
4. Maintain Plugin and Theme Updates
Keep WordPress, plugins, and themes updated using a controlled maintenance process.
However, do not update production software without checking compatibility and creating a backup.
5. Avoid Unnecessary Theme Dependencies
Whenever possible, use plugins for functionality that should remain available independently of your website’s design.
For example, a slider, contact form, SEO system, or custom post type should ideally be managed through a dedicated plugin rather than being permanently tied to a particular theme.
This makes future theme changes easier.
6. Use Standard WordPress Development Practices
Developers should follow WordPress coding standards when creating themes and plugins.
Use properly registered hooks, documented APIs, script dependencies, and standard template integration methods.
Plugins should avoid depending unnecessarily on undocumented theme functions.
Developers can review the WordPress Plugin Developer Handbook for recommended development practices.
7. Document Important Plugin Configurations
Maintain a record of important plugin settings, shortcodes, widget placements, custom CSS, and theme integration requirements.
This documentation makes it easier to restore functionality when changing themes or migrating websites.
When Should You Contact the Plugin or Theme Developer?
If you have completed the troubleshooting steps and the plugin still does not work, contacting the developer may be the most effective solution.
Provide enough technical information to help the developer reproduce the problem.
Include:
- Plugin name and version.
- Active theme name and version.
- WordPress version.
- PHP version.
- Description of the original functionality.
- Description of what stopped working.
- Exact error messages.
- Relevant browser console errors.
- Relevant PHP debug log entries.
- Results of testing with a default WordPress theme.
If the plugin works with a default theme but fails with your new theme, explain this clearly.
This information helps developers determine whether the issue is related to theme compatibility, missing dependencies, frontend styling, or another technical problem.
Avoid sharing administrator passwords or other sensitive login information in public support forums.
Conclusion
A WordPress plugin that stops working after a theme change does not necessarily mean the plugin is damaged or needs to be replaced.
In many situations, the problem is related to theme compatibility, missing widget areas, shortcode integration, JavaScript errors, CSS conflicts, or outdated cached files.
Start by checking the plugin’s activation status, clearing your website cache, reviewing its settings, and verifying theme compatibility. If the problem continues, inspect browser console errors, review PHP debug logs, and perform controlled theme and plugin conflict testing.
For more complicated problems, use a staging website to investigate the issue without affecting your live visitors.
The most effective long-term solution is to keep plugin functionality independent of theme-specific design wherever possible. By following WordPress development standards, testing compatibility, and maintaining regular backups, website owners can change themes without unnecessarily losing important plugin functionality.
Whether you are a website owner, WordPress administrator, or plugin developer, a systematic troubleshooting approach can help you identify the actual cause and restore your website’s functionality.
Frequently Asked Questions (FAQs)
1. Why does my WordPress plugin stop working after changing a theme?
A plugin may stop working because the new theme uses different templates, widget areas, CSS styles, JavaScript libraries, or PHP functions. These differences can create compatibility problems or prevent plugin features from displaying correctly.
2. Can changing a WordPress theme deactivate plugins?
Changing a theme does not normally deactivate installed plugins. However, plugin features that depend on the previous theme’s functionality, widget locations, or template structures may stop working.
3. Why are my plugin widgets missing after changing themes?
Different WordPress themes register different widget areas. Widgets assigned to areas that are not supported by the new theme may become inactive or disappear from the frontend. You may need to assign them to the new theme’s available widget areas.
4. Why does my plugin shortcode display as plain text after changing themes?
The shortcode may depend on functionality registered by the previous theme, or it may be placed in an unsupported editor location. Confirm that the shortcode belongs to the plugin, verify that the plugin is activated, and insert it using the appropriate Shortcode block.
5. Can CSS conflicts prevent a WordPress plugin from working?
Yes. Theme CSS can override plugin styles, hide elements, change container dimensions, or affect positioning. Inspect the affected elements using browser developer tools to identify conflicting CSS rules.
6. How can I identify a WordPress theme and plugin conflict?
Temporarily switch to a default WordPress theme on a staging website and test the plugin. If it works, reactivate the new theme and investigate its compatibility with the plugin. You can also use the Health Check & Troubleshooting plugin to isolate conflicts.
7. Should I reinstall a plugin if it stops working after a theme change?
Not immediately. First investigate theme compatibility, caching, widget configuration, shortcodes, JavaScript errors, and CSS conflicts. Reinstall the plugin only when there is evidence of damaged or missing plugin files and you have protected its settings and data.
8. Does changing a WordPress theme delete plugin settings?
Normally, changing a theme does not delete plugin settings. Most plugins store their configuration separately in the WordPress database. However, some features may become unavailable because their previous theme integration is no longer supported.
9. Can an outdated theme cause plugin compatibility problems?
Yes. An outdated theme may use deprecated WordPress functions, incompatible JavaScript libraries, or older integration methods. Updating the theme may resolve the issue, provided the update is compatible with your WordPress installation.
10. How can I prevent plugins from breaking when changing WordPress themes?
Create a complete backup, test the new theme on a staging website, review plugin compatibility requirements, and verify all important functionality before publishing the new theme. Prefer plugins that use standard WordPress APIs rather than relying on theme-specific functionality.