Introduction
Buttons are useful elements on almost every type of website. They encourage visitors to take action, navigate to important pages, download resources, register for services, contact a business, or explore additional content.
For example, a blog post might include a Read More button, a software tutorial might display a Download Plugin button, and a service article might contain a Contact Us button.
WordPress provides several ways to create these buttons, including page builders and third-party design plugins. However, installing a large page builder just to add a simple button is often unnecessary.
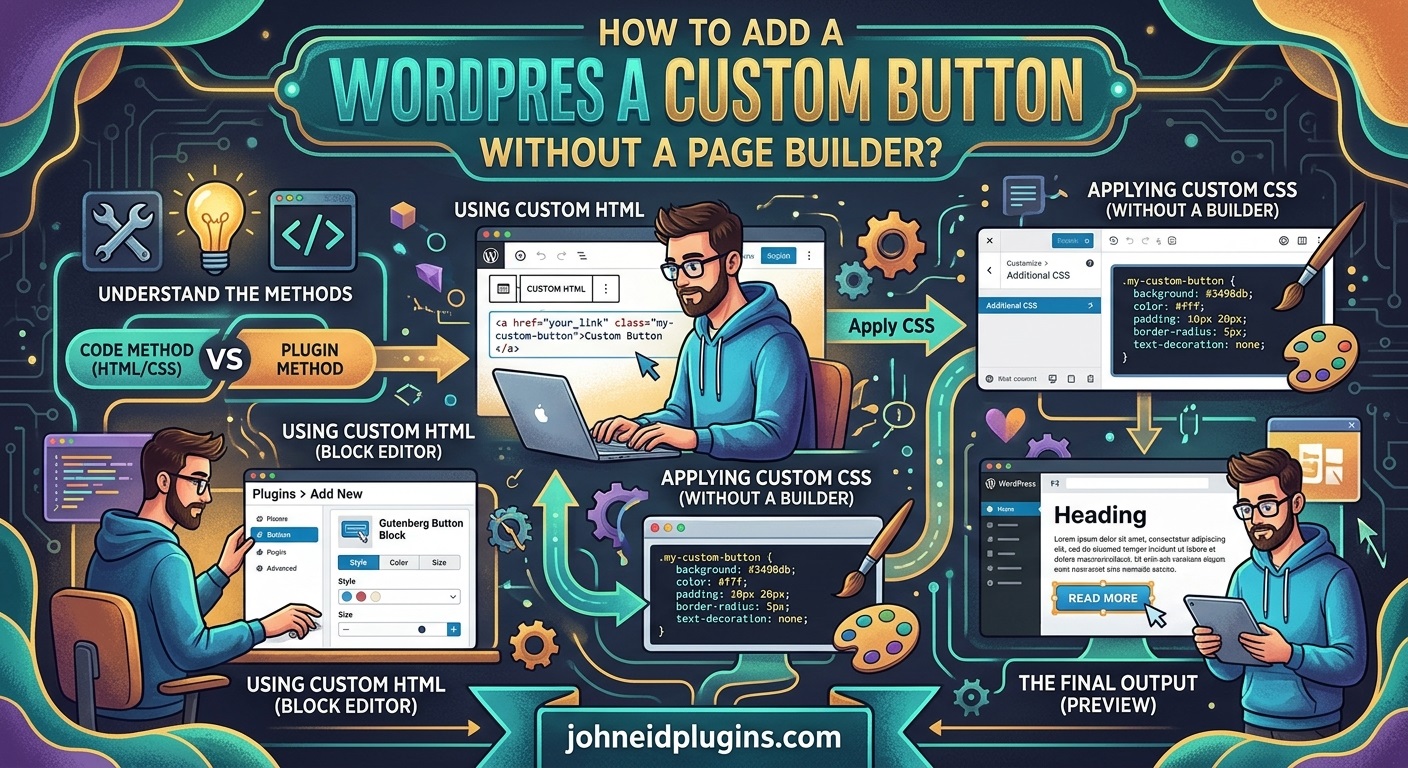
You can add a custom button directly to WordPress posts using the built-in Block Editor, customize its appearance with CSS, or create a reusable button using a lightweight plugin or shortcode.
These approaches give you control over the button’s text, destination URL, background color, text color, border radius, spacing, alignment, and hover effects without requiring a page builder.
In this guide, you will learn how to add a custom button to WordPress posts without a page builder, how to style it professionally, and how to troubleshoot common problems.
1. Why Add Custom Buttons to WordPress Posts?
A custom button makes an important action more visible than an ordinary text link.
Although hyperlinks are suitable for navigation, buttons can help visitors recognize actions that deserve attention.
Here are some common uses.
Download buttons
If you publish software, plugins, themes, templates, or other downloadable resources, a download button gives visitors a clear way to access the file.
For example:
- Download Plugin
- Download Free Template
- Get the Latest Version
- Download Documentation
Call-to-action buttons
A call-to-action (CTA) button encourages visitors to complete a particular action.
Examples include:
- Contact Us
- Request a Quote
- Get Started
- View Our Services
Internal navigation buttons
Buttons can direct visitors to other useful pages on your website.
For example, a tutorial about WordPress plugin development could include a button linking to a related guide or service page.
External resource buttons
You can also use buttons to link to external websites, documentation, online tools, and other useful resources.
Product and service buttons
Business websites may use buttons to direct visitors to product information, pricing pages, demonstrations, or enquiry forms.
The important point is to use buttons where an action should be visually prominent. Avoid turning every ordinary hyperlink into a button because excessive button styling can make a page difficult to scan.
2. Use the Built-in WordPress Button Block
The simplest way to add a custom button to a WordPress post is through the built-in Button block.
You do not need to install an additional plugin or write PHP code.
The WordPress Block Editor includes a dedicated button block that allows you to configure the button’s text, destination, alignment, colors, typography, and other design properties.
Step 1: Open a WordPress post
- Log in to your WordPress administration dashboard.
- Navigate to Posts → All Posts.
- Find the post where you want to add the button.
- Click Edit.
You can also create a new post if you want to test the button before adding it to an existing article.
Step 2: Insert the Button block
There are two common ways to insert the block.
Method A: Use the block inserter
- Click the plus (+) icon in the editor.
- Search for Buttons.
- Select the Buttons block.
- WordPress will insert a button inside the post.
Method B: Use the slash command
Click an empty paragraph in the editor and type:
/buttons
Select the Buttons block from the suggestions.
The editor will display a new button with editable placeholder text.
Step 3: Enter the button text
Click inside the button and replace its placeholder text.
For example:
Download Now
Other examples include:
- Read Full Article
- Contact Us
- View Details
- Get Started
- Download Documentation
Choose concise wording that clearly communicates the action.
Step 4: Add the destination URL
Select the button and click the link icon in its toolbar.
Enter the destination URL.
For example:
Press Enter to apply the link.
Make sure that the destination is correct and that the page or downloadable resource is accessible.
Step 5: Configure the button alignment
Select the Buttons block or the individual button and locate its alignment controls.
Depending on your WordPress version and theme, you may be able to choose:
- Left alignment
- Center alignment
- Right alignment
- Justified or full-width alignment
Center alignment is often useful for prominent CTA buttons, while left alignment may be more suitable for buttons placed within ordinary paragraphs.
Step 6: Customize button colors
Open the block settings in the editor’s right-hand sidebar.
Under the color settings, choose the available background and text colors.
For example:
- Background: dark blue
- Text: white
- Border: optional
- Hover color: controlled by your theme or custom CSS
Use colors that provide sufficient contrast and match your website’s visual identity.
Step 7: Adjust typography and dimensions
Depending on your WordPress version and theme, the Button block may provide settings for:
- Font size
- Font weight
- Padding
- Border radius
- Width
- Border settings
Adjust these properties to create a button that is easy to read and click.
Step 8: Preview and publish
Click Preview to check the button on the frontend.
Verify that:
- The button appears in the correct location.
- Its text is readable.
- The link works.
- The button does not overflow on mobile devices.
- The colors match your website design.
Once everything looks correct, update or publish the post.
For additional information, see the official WordPress Buttons block documentation.
3. Customize WordPress Buttons Using CSS
The built-in Button block is sufficient for many websites. However, its default appearance may not match your preferred design.
Custom CSS gives you more control over the button’s appearance without requiring a page builder.
You can customize:
- Background color
- Text color
- Border
- Border radius
- Padding
- Font size
- Font weight
- Hover effects
- Transition effects
- Responsive width
Step 1: Add a CSS class to your button
Open the WordPress post editor and select the button you want to customize.
In the block settings sidebar:
- Open the Advanced section.
- Locate Additional CSS class(es).
- Enter the following class:
custom-post-button
Do not include the dot before the class name in this field.
Save or update the post.
Step 2: Add custom CSS
Navigate to:
Appearance → Customize → Additional CSS
If your theme does not provide the Customizer, use its supported stylesheet or another appropriate method for adding site-wide CSS.
Paste the following CSS:
.custom-post-button .wp-block-button__link {
    background-color: #1769aa;
    color: #ffffff;
    padding: 14px 28px;
    border-radius: 6px;
    font-size: 16px;
    font-weight: 600;
    text-decoration: none;
    border: 2px solid #1769aa;
    display: inline-block;
    transition: all 0.3s ease;
}

.custom-post-button .wp-block-button__link:hover {
    background-color: #ffffff;
    color: #1769aa;
    border-color: #1769aa;
}
This CSS creates a blue button with white text. When visitors move their pointer over it, the background becomes white and the text becomes blue.
The exact appearance may depend on your theme’s existing styles.
Step 3: Adjust the button design
You can change the values to match your website.
For example:
Change the background color:
background-color: #198754;Change the text color:
color: #ffffff;Make the button more rounded:
border-radius: 30px;Increase button size:
padding: 18px 35px;Make the text bold:
font-weight: 700;Increase the font size:
font-size: 18px;After changing the CSS, save your settings and reload the post.
Step 4: Add a mobile-friendly style
A button that looks good on a desktop may be difficult to use on a smaller screen.
Add the following CSS to improve its mobile appearance:
@media (max-width: 600px) {
    .custom-post-button .wp-block-button__link {
        padding: 12px 22px;
        font-size: 15px;
        max-width: 100%;
        box-sizing: border-box;
    }
}
This reduces the button’s padding and font size on smaller screens.
For more information about CSS selectors and responsive styling, consult the MDN CSS documentation.
4. Create a Custom Button Using HTML
Another option is to add a button using a Custom HTML block.
This approach is useful when you need a specific HTML structure or want to create a button independently of the standard Button block.
Step 1: Insert a Custom HTML block
- Open your WordPress post.
- Click the plus (+) block inserter.
- Search for Custom HTML.
- Select the block.
- Insert it where you want the button to appear.
Step 2: Add the button HTML
Paste the following example:
<a class="article-custom-button"
   href="https://example.com/download/"
   target="_blank"
   rel="noopener noreferrer">
   Download Now
</a>
Replace the example URL with your actual destination.
The target="_blank" attribute opens the link in a new tab. The rel="noopener noreferrer" attributes provide additional protection and control when opening a new tab.
If you want the link to open in the same tab, remove target="_blank" and the associated rel attributes if they are no longer needed.
Step 3: Add CSS for the HTML button
Add this CSS to your site’s stylesheet or Additional CSS area:
.article-custom-button {
    display: inline-block;
    background: #1769aa;
    color: #ffffff;
    padding: 14px 28px;
    border-radius: 6px;
    text-decoration: none;
    font-size: 16px;
    font-weight: 600;
    transition: background 0.3s ease;
}

.article-custom-button:hover {
    background: #0d4777;
    color: #ffffff;
}
Your HTML button will now display with a custom background, readable text, rounded corners, and a hover effect.
Step 4: Preview the result
Use the WordPress preview option to check the button.
If it does not appear correctly, check whether your theme or another plugin is overriding the CSS.
Also remember that WordPress may restrict certain HTML elements or attributes for users without the required permissions. Use the appropriate editor permissions and follow WordPress security practices.
5. Create a Reusable Custom Button With a Shortcode
If you want to insert the same button design into multiple WordPress posts, a shortcode can make the process easier.
Instead of repeatedly writing HTML, you can create a shortcode and use it wherever required.
For a maintainable implementation, place the shortcode in a small custom plugin rather than editing your active theme’s functions.php file.
Step 1: Create a custom plugin folder
On your computer, create a folder named:
simple-custom-button
Inside that folder, create a PHP file:
simple-custom-button.php
Step 2: Add the plugin header
Open the PHP file and add:
<?php
/**
 * Plugin Name: Simple Custom Button
 * Description: Adds a reusable custom button shortcode to WordPress posts.
 * Version: 1.0.0
 * Author: Your Name
 * License: GPL-2.0-or-later
 */

if ( ! defined( 'ABSPATH' ) ) {
    exit;
}
The ABSPATH check prevents direct access to the PHP file outside the WordPress environment.
Step 3: Register the shortcode
Add the following code below the plugin header:
function scb_custom_button_shortcode( $atts ) {

    $atts = shortcode_atts(
        array(
            'text'  => 'Read More',
            'url'   => '#',
            'class' => '',
        ),
        $atts,
        'custom_button'
    );

    $text = sanitize_text_field( $atts['text'] );
    $url  = esc_url( $atts['url'] );

    if ( empty( $url ) ) {
        return '';
    }

    $class = sanitize_html_class( $atts['class'] );

    $classes = 'scb-custom-button';

    if ( $class ) {
        $classes .= ' ' . $class;
    }

    return sprintf(
        '<a class="%1$s" href="%2$s">%3$s</a>',
        esc_attr( $classes ),
        $url,
        esc_html( $text )
    );
}

add_shortcode( 'custom_button', 'scb_custom_button_shortcode' );
This shortcode accepts three attributes:
text: The visible button label.url: The destination address.class: An optional additional CSS class.
The code uses WordPress sanitization and escaping functions to handle shortcode attributes safely.
Step 4: Add the button CSS
Add this CSS to your theme’s stylesheet or Additional CSS area:
.scb-custom-button {
    display: inline-block;
    background-color: #1769aa;
    color: #ffffff;
    padding: 14px 28px;
    border-radius: 6px;
    text-decoration: none;
    font-weight: 600;
    transition: background-color 0.3s ease;
}

.scb-custom-button:hover {
    background-color: #0d4777;
    color: #ffffff;
}
Step 5: Install and activate the plugin
- Compress the
simple-custom-buttonfolder into a ZIP file. - Open your WordPress dashboard.
- Navigate to Plugins → Add New → Upload Plugin.
- Select the ZIP file.
- Click Install Now.
- Activate the plugin.
Step 6: Insert the shortcode into a post
Open a WordPress post and insert a Shortcode block.
Enter:
[custom_button text="Download Now" url="https://example.com/download/"]You can change the text and URL whenever required.
For another button, use:
[custom_button text="Contact Us" url="https://example.com/contact/"]You can also supply an additional CSS class:
[custom_button text="View Services" url="https://example.com/services/" class="service-button"]This approach is useful when you need consistent button styling throughout a website.
For further development guidance, consult the official WordPress Shortcode API documentation.
6. How to Make Custom WordPress Buttons Accessible
A professional button should not only look attractive; it should also be usable by visitors with different devices and accessibility requirements.
Follow these recommendations.
Use descriptive button text
Avoid vague labels such as:
- Click Here
- Press Here
- More
Instead, describe the action:
- Download Plugin
- Read Installation Guide
- View Pricing
- Contact Support
Clear labels help visitors understand what will happen when they activate the button.
Maintain sufficient color contrast
Button text should remain readable against its background.
For example, white text on a dark blue background generally provides better readability than white text on a pale blue background.
The WCAG accessibility guidelines provide recommendations for text contrast and other accessibility requirements.
Make buttons easy to activate
Buttons should have enough space for comfortable interaction, particularly on touchscreens.
Avoid very small buttons or placing several buttons too close together.
Preserve keyboard navigation
Visitors should be able to navigate interactive elements using a keyboard.
Use actual links for navigation and actual button elements for actions such as submitting forms or triggering an interface change.
Do not remove visible keyboard focus indicators without providing a suitable replacement.
Use meaningful link destinations
A button that says “Download Plugin” should lead to the expected download resource.
If it opens an external website or a new tab, make the behavior clear where appropriate.
7. How to Add a Download Button to WordPress Posts
Download buttons are common on software, plugin, theme, and resource websites.
You can create one using the built-in Button block or the HTML approach explained earlier.
Upload a file to the WordPress Media Library
If you host the downloadable file on your own website:
- Navigate to Media → Add New Media File.
- Upload the file.
- Open the uploaded media item.
- Copy its file URL.
- Return to your WordPress post.
- Add a Button block.
- Enter text such as “Download Now”.
- Paste the file URL into the link field.
Publish or update the post.
Link to an external download
If the file is hosted on another website, use its verified download URL.
Check that the destination is trustworthy and that the file is still available.
For software downloads, provide useful information such as the version number, file type, and update date.
Avoid unnecessary redirects
If visitors click a download button and pass through several unrelated pages before reaching the file, the experience can become confusing.
Use a clear and reliable download destination.
For sensitive or paid downloads, use an appropriate access-control solution rather than relying on an unprotected public file URL.
8. Common Problems When Adding Custom Buttons to WordPress Posts
Although adding buttons is usually straightforward, certain issues can prevent them from appearing or functioning correctly.
Button does not appear on the frontend
Possible causes include:
- Incorrect block placement
- Invalid HTML
- Theme CSS conflicts
- Plugin conflicts
- Cached page content
Check the editor preview and clear relevant caches before testing again.
Button colors do not change
Your theme may apply CSS rules with higher specificity.
Inspect the button using browser developer tools and check which CSS rule controls its background and text color.
You may need to adjust your selector or remove conflicting styles.
Avoid adding !important everywhere. Use it only when necessary after identifying the actual conflict.
Button appears too small
Check the CSS padding and font size.
For example:
.article-custom-button {
    padding: 16px 32px;
    font-size: 17px;
}
Button does not work
Check whether:
- The URL is correct.
- The destination page exists.
- The link includes the correct protocol, such as
https://. - A JavaScript error is interfering with interaction.
- Another plugin or security rule is modifying the link.
Button looks different on mobile devices
Use responsive CSS and test the page at several viewport widths.
Check for fixed widths, excessive padding, and long button labels.
Shortcode appears as plain text
If WordPress displays [custom_button ...] instead of a button, check that:
- The shortcode plugin is active.
- The shortcode is entered into a Shortcode block or another supported shortcode area.
- The shortcode name is correct.
- The PHP code contains no syntax errors.
- The shortcode registration runs successfully.
If you use a custom plugin, check its activation status and WordPress error logs.
9. Best Practices for Using Custom Buttons in Blog Posts
Adding buttons is easy, but using them effectively requires thoughtful design.
Follow these best practices:
Keep button text short: Visitors should understand the action immediately.
Use consistent styling: Reuse a small set of colors, fonts, and border styles across your website.
Choose meaningful destinations: Each button should lead to a relevant page, resource, or action.
Avoid excessive buttons: Too many CTAs can distract readers from the main article.
Use responsive dimensions: Buttons should remain readable and usable on mobile devices.
Test every link: Verify that each button works before publishing the post.
Use accessible colors: Maintain readable contrast between text and background.
Avoid unnecessary plugins: Use the built-in WordPress Button block when it meets your requirements.
Keep reusable code separate: If you create a shortcode, place it in a small custom plugin so it is not lost when changing themes.
Check performance: Avoid loading large JavaScript libraries just to display a simple button.
Frequently Asked Questions
1. Can I add a custom button to WordPress posts without a page builder?
Yes. You can use the built-in WordPress Button block, a Custom HTML block with CSS, or a shortcode provided by a lightweight custom plugin. None of these methods requires a page builder.
2. Does WordPress have a built-in button block?
Yes. The WordPress Block Editor includes a Buttons block. It allows you to add one or more buttons and configure their text, links, alignment, colors, and other available design settings.
3. How can I change the background color of a WordPress button?
Select the Button block in the editor and use its color settings. Alternatively, assign a custom CSS class and define the background color in your website’s stylesheet.
4. Can I add a download button to a WordPress blog post?
Yes. Upload your file to the Media Library, copy its URL, insert a Button block, and link the button to the file. You can also link to an external download resource.
5. Can I use the same custom button on multiple posts?
Yes. You can create a reusable block, use a synced pattern where supported, or create a shortcode in a custom plugin. A shortcode is especially useful when you want to reuse the same button design with different text and URLs.
6. Is custom CSS better than using a button plugin?
It depends on your requirements. CSS is suitable for simple visual customization and avoids installing an additional plugin. A dedicated plugin may be useful if you need a button management interface, reusable templates, advanced conditions, or additional functionality.
7. Will custom buttons work with every WordPress theme?
The standard Button block works with modern WordPress themes, although the default appearance varies. Custom CSS may need adjustments to match a particular theme’s styles.
8. Can I open a WordPress button link in a new tab?
Yes. Select the button, open its link settings, and enable the option to open the link in a new tab. When using HTML, you can use target="_blank" together with rel="noopener noreferrer".
9. Can I create rounded buttons in WordPress?
Yes. The Button block may provide border-radius settings, depending on your theme and editor configuration. You can also use CSS such as border-radius: 30px; to create rounded or pill-shaped buttons.
10. Will adding custom buttons slow down my WordPress website?
A simple Button block or HTML link with CSS generally adds very little overhead. Avoid unnecessary plugins and large JavaScript libraries when a simple button is all you need.
Conclusion
Adding a custom button to WordPress posts does not require an expensive page builder or complicated development tools.
The built-in WordPress Button block is the easiest option for most users. If you want greater control over appearance, custom CSS allows you to change colors, spacing, typography, borders, and hover effects. For websites that need reusable buttons across multiple posts, a shortcode-based custom plugin provides a flexible solution.
Choose the approach that matches your requirements. Keep button text clear, use accessible colors, test links carefully, and make sure the design works on desktop and mobile devices.
By using WordPress’s built-in features and a small amount of custom CSS or PHP where necessary, you can create professional buttons while keeping your website lightweight and avoiding unnecessary page-builder dependencies.