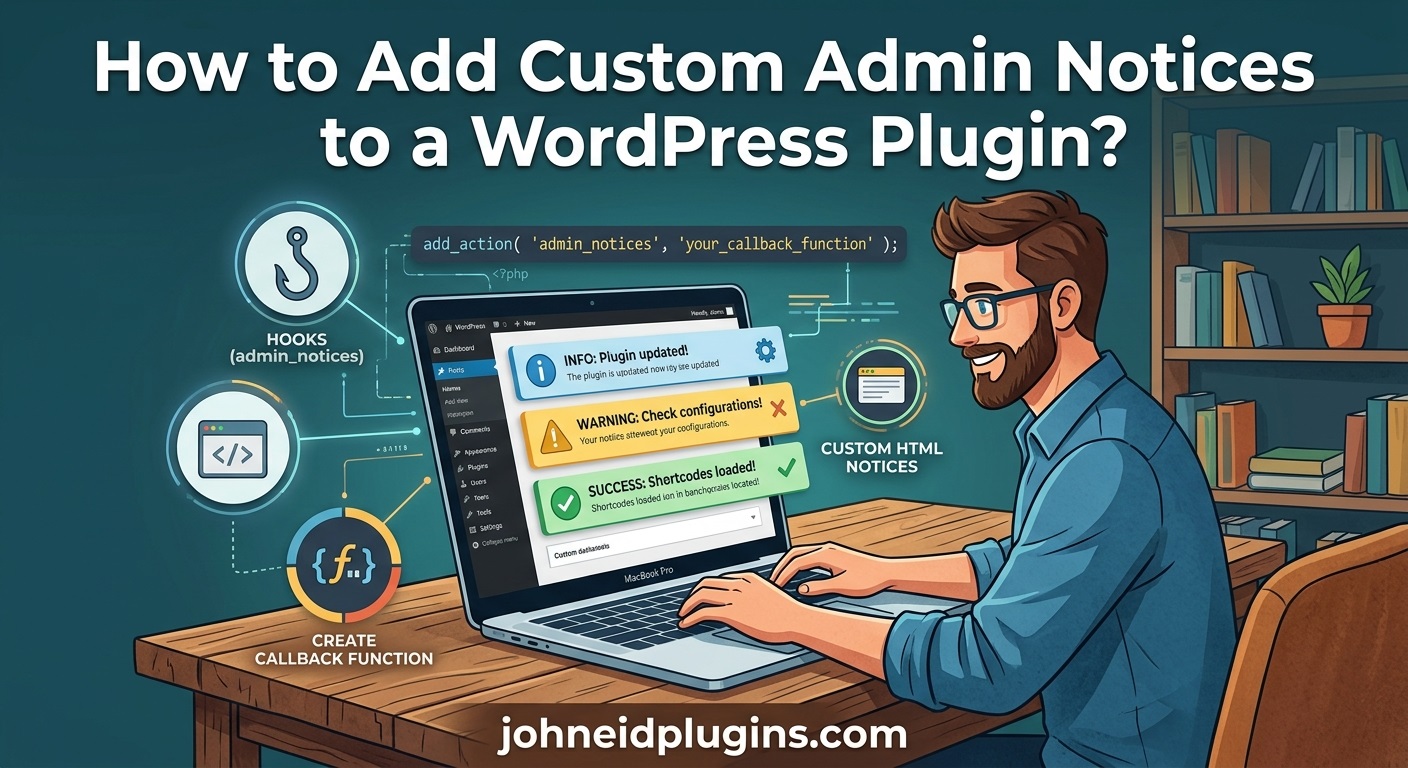
Introduction
WordPress admin notices are an important part of plugin development because they help communicate essential information to website administrators. Whether a plugin has been activated successfully, an operation has failed, a configuration needs attention, or an update requires user action, admin notices provide a convenient way to display messages directly inside the WordPress dashboard.
Many WordPress plugins use custom admin notices to improve user experience and make their functionality easier to understand. For example, a backup plugin might display a success message after completing a backup, while a security plugin might show a warning when an important security setting is disabled.
However, not every plugin developer knows how to implement admin notices correctly. Some developers display messages on every administration page, while others create notices that cannot be dismissed, contain improperly escaped output, or continue appearing even after the underlying problem has been resolved.
These implementation mistakes can make a plugin difficult to use and create unnecessary distractions for website administrators.
Fortunately, WordPress provides built-in hooks, functions, and CSS classes that allow developers to create professional admin notices without depending on external notification libraries.
In this guide, you will learn how to add custom admin notices to a WordPress plugin using PHP, how to display success and error messages, how to create dismissible notifications, how to show notices on specific administration pages, and how to manage persistent messages.
We will also cover security considerations, common implementation mistakes, practical code examples, and development best practices.
Whether you are developing a new WordPress plugin or improving an existing one, these techniques will help you create a more professional and user-friendly administration experience.
1. Understand WordPress Admin Notices
Admin notices are notification messages displayed inside the WordPress administration dashboard.
They usually appear near the top of an administration screen and communicate information about plugin operations, website settings, system conditions, and user actions.
For example, a plugin might display the following messages:
- Plugin activated successfully.
- Your settings have been saved.
- The backup operation has failed.
- Please configure your API credentials.
- A required plugin dependency is missing.
- Your plugin version is outdated.
WordPress provides different notice types to help administrators distinguish between successful operations, warnings, errors, and general information.
The standard notice types include:
| Notice type | CSS class | Typical purpose |
|---|---|---|
| Success | notice-success | Confirm a successful operation. |
| Error | notice-error | Report a failed operation. |
| Warning | notice-warning | Highlight a potential problem. |
| Information | notice-info | Display general information. |
These notices use WordPress administration styling, so developers do not need to create an entirely new notification interface.
The official WordPress admin_notices documentation explains how the administration notice system works.
2. Use the admin_notices Action Hook
The simplest way to add a custom admin notice to a WordPress plugin is through the admin_notices action hook.
This hook allows developers to output custom HTML inside the WordPress administration dashboard.
For example, the following code displays a basic success notification:
function myplugin_admin_success_notice() {

    echo '<div class="notice notice-success">';
    echo '<p>Plugin operation completed successfully.</p>';
    echo '</div>';

}

add_action(
    'admin_notices',
    'myplugin_admin_success_notice'
);
When this code executes, WordPress displays a success message in the administration area.
Let’s understand the important parts:
myplugin_admin_success_notice()is the function responsible for generating the message.noticeis the standard WordPress notice CSS class.notice-successidentifies the notification as a success message.- The paragraph element contains the actual notification text.
add_action()connects the function to the WordPressadmin_noticeshook.
This is a simple implementation, but it displays the message on every administration screen.
For a real plugin, displaying the same message everywhere is usually unnecessary. Later sections explain how to restrict notifications to specific screens and conditions.
3. Create Different Types of Admin Notices
A professional WordPress plugin should display appropriate notification types depending on the result of an operation.
For example, successful operations should use success notices, while failed operations should use error notices.
Developers can create separate functions for different notification types.
Success notice
Use the notice-success class when an operation completes successfully.
function myplugin_success_notice() {

    ?>
    <div class="notice notice-success">
        <p>
            <?php
            echo esc_html(
                'Your plugin settings have been saved successfully.'
            );
            ?>
        </p>
    </div>
    <?php

}

add_action(
    'admin_notices',
    'myplugin_success_notice'
);
Error notice
Use notice-error to communicate unsuccessful operations.
function myplugin_error_notice() {

    ?>
    <div class="notice notice-error">
        <p>
            <?php
            echo esc_html(
                'Unable to save plugin settings. Please try again.'
            );
            ?>
        </p>
    </div>
    <?php

}

add_action(
    'admin_notices',
    'myplugin_error_notice'
);
Warning notice
Use notice-warning when administrators need to pay attention to a potential problem.
function myplugin_warning_notice() {

    ?>
    <div class="notice notice-warning">
        <p>
            <?php
            echo esc_html(
                'Your API configuration is incomplete.'
            );
            ?>
        </p>
    </div>
    <?php

}

add_action(
    'admin_notices',
    'myplugin_warning_notice'
);
Information notice
Use notice-info for general information.
function myplugin_info_notice() {

    ?>
    <div class="notice notice-info">
        <p>
            <?php
            echo esc_html(
                'A new plugin configuration option is available.'
            );
            ?>
        </p>
    </div>
    <?php

}

add_action(
    'admin_notices',
    'myplugin_info_notice'
);
These examples demonstrate how to create the four standard WordPress notification types.
For production plugins, however, it is better to display these notices only when the corresponding condition is satisfied.
4. Create Dismissible Admin Notices
Sometimes administrators do not need to see the same notification repeatedly.
For example, a plugin might display an introductory message explaining how to configure its settings. Once the administrator has read it, the notification should be removable.
WordPress supports dismissible notices through the is-dismissible CSS class.
Here is an example:
function myplugin_dismissible_notice() {

    ?>
    <div class="notice notice-success is-dismissible">
        <p>
            Your plugin has been configured successfully.
        </p>
    </div>
    <?php

}

add_action(
    'admin_notices',
    'myplugin_dismissible_notice'
);
The is-dismissible class enables the standard WordPress dismissal interface.
Administrators can click the close icon to hide the notice.
However, there is an important limitation: standard dismissible notices do not automatically remember the dismissal across future page loads.
The notification may appear again when the page is refreshed or another administration page is opened.
If you want a notice to remain dismissed, you need to implement additional storage logic, such as user-specific options or AJAX-based dismissal handling.
You can learn more about the standard behavior through the WordPress admin_notices reference.
5. Use wp_admin_notice() in Modern WordPress Plugins
WordPress introduced two useful functions for generating administration notices in version 6.4:
wp_admin_notice()wp_get_admin_notice()
These functions provide a standardized way to generate notices without manually writing the complete HTML structure.
The wp_admin_notice() function outputs a notification using a message and an arguments array.
For example:
function myplugin_display_notice() {

    wp_admin_notice(
        __(
            'Your plugin settings have been saved successfully.',
            'myplugin'
        ),
        array(
            'type'        => 'success',
            'dismissible' => true
        )
    );

}

add_action(
    'admin_notices',
    'myplugin_display_notice'
);
This approach is cleaner than manually constructing the notice markup.
Understanding the arguments
The function accepts different configuration options.
| Argument | Description |
|---|---|
type | Defines the notice type, such as success, error, warning, or info. |
dismissible | Determines whether the administrator can dismiss the notice. |
id | Adds an HTML ID to the notice container. |
additional_classes | Adds extra CSS classes. |
attributes | Allows additional HTML attributes. |
paragraph_wrap | Determines whether the message is wrapped in paragraph tags. |
For example, a dismissible warning notice can be created as follows:
function myplugin_api_warning() {

    wp_admin_notice(
        __(
            'Your API connection requires attention.',
            'myplugin'
        ),
        array(
            'type'        => 'warning',
            'dismissible' => true,
            'id'          => 'myplugin-api-warning'
        )
    );

}

add_action(
    'admin_notices',
    'myplugin_api_warning'
);
Compatibility consideration: wp_admin_notice() was introduced in WordPress 6.4. If your plugin supports older WordPress versions, provide a compatible fallback using the admin_notices hook and standard notice markup.
The official wp_admin_notice() reference provides additional implementation details.
You can also read the WordPress Core announcement about introducing admin notice functions in WordPress 6.4.
6. Display Admin Notices Only on Specific Plugin Pages
Displaying notifications throughout the entire WordPress administration dashboard can negatively affect the user experience.
For example, if your plugin provides a settings page, its configuration warnings should generally appear only on that page rather than on the Posts, Pages, Media, or Dashboard screens.
WordPress provides the get_current_screen() function to identify the currently displayed administration screen.
Consider this example:
function myplugin_settings_notice() {

    $screen = get_current_screen();

    if ( ! $screen ) {
        return;
    }

    if (
        'toplevel_page_myplugin-settings'
        !== $screen->id
    ) {
        return;
    }

    wp_admin_notice(
        __(
            'Welcome to the plugin settings page.',
            'myplugin'
        ),
        array(
            'type' => 'info'
        )
    );

}

add_action(
    'admin_notices',
    'myplugin_settings_notice'
);
In this example, the notification appears only when the administrator visits the specified plugin settings page.
The screen ID depends on how the plugin registers its administration menu.
For example, if the plugin uses:
add_menu_page(
    'My Plugin Settings',
    'My Plugin',
    'manage_options',
    'myplugin-settings',
    'myplugin_settings_page'
);
The corresponding top-level screen ID will generally be:
toplevel_page_myplugin-settingsFor submenu pages, the screen ID generally includes the parent menu slug.
Development tip: If you are unsure about the screen ID, temporarily inspect the $screen->id property using the PHP error log.
For further information, consult the get_current_screen() documentation.
7. Display Admin Notices After Saving Plugin Settings
One of the most useful applications of custom admin notices is displaying confirmation messages after an administrator saves plugin settings.
For example, imagine a plugin that allows users to configure:
- API credentials.
- Image dimensions.
- Slider settings.
- Display preferences.
- Custom post type options.
- Integration settings.
After submitting the settings form, administrators should receive clear feedback indicating whether the operation succeeded.
WordPress provides the Settings API, which can help developers register and manage plugin configuration options.
For example, a settings page can use the settings-updated query parameter after successfully processing a standard settings form.
You can display a success notice as follows:
function myplugin_settings_saved_notice() {

    if (
        ! isset($_GET['settings-updated'])
    ) {
        return;
    }

    if (
        'true' !==
        sanitize_text_field(
            wp_unslash(
                $_GET['settings-updated']
            )
        )
    ) {
        return;
    }

    wp_admin_notice(
        __(
            'Plugin settings saved successfully.',
            'myplugin'
        ),
        array(
            'type'        => 'success',
            'dismissible' => true
        )
    );

}

add_action(
    'admin_notices',
    'myplugin_settings_saved_notice'
);
This example checks whether WordPress has indicated that the settings were updated.
It then displays a success notification.
For production implementations, also ensure that the notice appears only on the relevant plugin settings screen.
Important: The settings-updated parameter is useful with standard WordPress Settings API workflows. Custom form handlers should generate their own trusted success or failure state rather than relying on an arbitrary URL parameter.
For additional guidance, see the WordPress Settings API documentation.
8. Display Admin Notices After Plugin Activation
Plugin activation is another common situation where custom admin notices are useful.
For example, after activation, a plugin might need to inform administrators that:
- Initial configuration is required.
- An API connection must be established.
- A required dependency is missing.
- Default settings have been created.
- A setup wizard is available.
However, developers should understand that WordPress redirects after plugin activation.
Consequently, directly displaying HTML inside the activation callback is not the correct approach.
Instead, save a temporary notification state during activation and display it after the administrator returns to the dashboard.
WordPress transients are useful for this purpose.
Step 1: Set a transient during activation
function myplugin_activate() {

    set_transient(
        'myplugin_activation_notice',
        'success',
        60
    );

}

register_activation_hook(
    __FILE__,
    'myplugin_activate'
);
This stores a temporary value indicating that the plugin was activated.
Step 2: Display the notice after activation
function myplugin_activation_notice() {

    $notice = get_transient(
        'myplugin_activation_notice'
    );

    if ( ! $notice ) {
        return;
    }

    if ( 'success' === $notice ) {

        wp_admin_notice(
            __(
                'My Plugin has been activated successfully. Configure your settings to get started.',
                'myplugin'
            ),
            array(
                'type'        => 'success',
                'dismissible' => true
            )
        );

    }

    delete_transient(
        'myplugin_activation_notice'
    );

}

add_action(
    'admin_notices',
    'myplugin_activation_notice'
);
How this implementation works
- WordPress activates the plugin.
- The activation callback creates a transient.
- WordPress redirects to the administration area.
- The
admin_noticeshook checks the transient. - The plugin displays the activation message.
- The transient is deleted after the message is displayed.
This approach prevents unexpected output during plugin activation and makes the notification available after the redirect.
For more information, read the WordPress Transients API documentation.
9. Create Persistent Admin Notices Using User-Specific Options
Sometimes a plugin needs to display a notification until an administrator explicitly dismisses it.
For example, a security plugin might display a warning that two-factor authentication has not been configured.
If the administrator dismisses the message, it should not immediately return on the next dashboard visit.
A user-specific option can store the dismissal state.
Consider this implementation:
function myplugin_persistent_notice() {

    $user_id = get_current_user_id();

    if (
        get_user_meta(
            $user_id,
            'myplugin_notice_dismissed',
            true
        )
    ) {
        return;
    }

    ?>
    <div
        class="notice notice-warning"
        id="myplugin-security-notice"
    >
        <p>
            Your security configuration requires attention.
        </p>

        <button
            type="button"
            class="button"
            id="myplugin-dismiss-notice"
        >
            Dismiss
        </button>
    </div>
    <?php
}

add_action(
    'admin_notices',
    'myplugin_persistent_notice'
);
This code checks whether the current administrator has previously dismissed the notification.
However, the example requires JavaScript and a secure AJAX handler to save the dismissal state.
A simple JavaScript implementation might look like this:
jQuery(function($) {

    $('#myplugin-dismiss-notice').on(
        'click',
        function() {

            $.post(
                ajaxurl,
                {
                    action: 'myplugin_dismiss_notice'
                },
                function(response) {

                    if (response.success) {

                        $('#myplugin-security-notice').remove();

                    }

                }
            );

        }
    );

});
The AJAX handler must be registered separately.
add_action(
    'wp_ajax_myplugin_dismiss_notice',
    'myplugin_handle_dismiss_notice'
);

function myplugin_handle_dismiss_notice() {

    check_ajax_referer(
        'myplugin_dismiss_notice',
        'nonce'
    );

    update_user_meta(
        get_current_user_id(),
        'myplugin_notice_dismissed',
        1
    );

    wp_send_json_success();

}
For this example to work, the AJAX request must also send the corresponding nonce.
Generate it using:
wp_create_nonce(
    'myplugin_dismiss_notice'
);
Pass the nonce to your JavaScript through a properly enqueued script configuration.
This example demonstrates the overall approach, but a production implementation should also check the user’s capability, validate the AJAX request, and ensure the dismissal is scoped to the correct notice.
User-specific storage is useful when different administrators should be able to dismiss notifications independently.
10. Create a Reusable Admin Notice Class
As a plugin grows, developers may need to display multiple notifications from different PHP files.
Creating a separate function for every notification can make the code unnecessarily complicated.
A reusable class provides a cleaner solution.
For example:
class MyPlugin_Admin_Notices {

    public function __construct() {

        add_action(
            'admin_notices',
            array($this, 'display_notices')
        );

    }

    public function display_notices() {

        $this->success(
            'Plugin settings saved successfully.'
        );

    }

    public function success($message) {

        wp_admin_notice(
            $message,
            array(
                'type'        => 'success',
                'dismissible' => true
            )
        );

    }

    public function error($message) {

        wp_admin_notice(
            $message,
            array(
                'type'        => 'error',
                'dismissible' => true
            )
        );

    }

    public function warning($message) {

        wp_admin_notice(
            $message,
            array(
                'type'        => 'warning',
                'dismissible' => true
            )
        );

    }

    public function info($message) {

        wp_admin_notice(
            $message,
            array(
                'type'        => 'info',
                'dismissible' => true
            )
        );

    }

}

new MyPlugin_Admin_Notices();
Now other parts of the plugin can use the same notification class.
For example:
$notices = new MyPlugin_Admin_Notices();

$notices->success(
    'Backup completed successfully.'
);
However, this basic implementation displays its success message whenever display_notices() executes.
A more advanced class should store notification messages and their types, then display them only when an actual operation generates a message.
This architecture becomes especially useful in plugins with multiple settings pages, import tools, backup operations, and external integrations.
11. Add Custom Admin Notice Styling
WordPress provides standard notice styles, but sometimes a plugin developer may want to add small visual improvements.
For example, you might want to highlight a notice with an additional CSS class.
WordPress supports additional notice classes through its standard markup and through the newer wp_admin_notice() function.
Example:
function myplugin_custom_styled_notice() {

    wp_admin_notice(
        __(
            'Your plugin requires additional configuration.',
            'myplugin'
        ),
        array(
            'type' => 'warning',

            'additional_classes' => array(
                'myplugin-custom-notice',
                'notice-alt'
            ),

            'dismissible' => true
        )
    );

}

add_action(
    'admin_notices',
    'myplugin_custom_styled_notice'
);
You can then enqueue a custom stylesheet for your plugin’s administration screens.
For example:
.myplugin-custom-notice {
    padding: 12px;
    border-radius: 4px;
}

.myplugin-custom-notice p {
    font-size: 14px;
    line-height: 1.6;
}
Avoid overriding the entire WordPress notice design unnecessarily.
Your plugin’s notification interface should remain consistent with the WordPress administration experience.
Also, enqueue custom CSS only on the plugin screens that need it.
You can learn about proper asset loading through the WordPress administration enqueue scripts documentation.
12. Add Action Links Inside Admin Notices
Sometimes a notification should do more than communicate information.
For example, a plugin might tell administrators that an API connection is incomplete and provide a direct link to the relevant settings page.
WordPress notices can contain HTML links.
The wp_admin_notice() function uses wp_kses_post() when outputting the message, allowing permitted post-style HTML markup.
Example:
function myplugin_api_configuration_notice() {

    $settings_url = admin_url(
        'admin.php?page=myplugin-settings'
    );

    $message = sprintf(
        __(
            'Your API connection is incomplete. <a href="%s">Configure API settings</a>.',
            'myplugin'
        ),
        esc_url($settings_url)
    );

    wp_admin_notice(
        $message,
        array(
            'type'        => 'warning',
            'dismissible' => true
        )
    );

}

add_action(
    'admin_notices',
    'myplugin_api_configuration_notice'
);
This creates a warning notice containing a link to the plugin settings page.
For better user experience, action links should take administrators directly to the screen where they can resolve the problem.
Avoid adding unnecessary promotional links or multiple unrelated actions to every notification.
13. Follow WordPress Security Practices When Creating Notices
Security is an important consideration when displaying dynamic notification messages.
Admin notices sometimes contain information retrieved from:
- Database options.
- User input.
- API responses.
- Form submissions.
- External services.
- Plugin error messages.
Displaying these values without proper escaping can introduce security vulnerabilities, including Cross-Site Scripting (XSS).
For example, avoid directly displaying untrusted input:
echo $_POST['message'];Instead, sanitize incoming data when appropriate and escape it when displaying it.
For plain-text notification messages, use:
echo esc_html($message);For HTML attributes, use:
esc_attr($value);For URLs, use:
esc_url($url);When using wp_admin_notice(), remember that its output is filtered through wp_kses_post(). However, developers should still escape dynamic values according to their output context, particularly values inserted into URLs or attributes.
Additional security practices include:
- Check user capabilities before displaying sensitive administrative information.
- Validate data received from external services.
- Use nonces for administrative form submissions and AJAX operations.
- Avoid exposing API keys, passwords, or private server information in error messages.
- Use proper internationalization functions for translatable messages.
The WordPress escaping documentation and WordPress plugin security guide provide useful guidance.
14. Common Mistakes to Avoid When Adding Admin Notices
Even simple notification implementations can create problems when developers overlook WordPress development practices.
Here are some common mistakes.
Displaying notices on every administration screen
A notification about one specific plugin setting should not appear throughout the dashboard unnecessarily.
Use get_current_screen() to restrict messages to relevant pages.
Using the wrong notice CSS class
Use the standard classes:
notice-successnotice-errornotice-warningnotice-info
Avoid inventing unnecessary notice types that do not follow WordPress conventions.
Assuming dismissible means permanently dismissed
The is-dismissible class only provides the standard dismissal interface. It does not automatically create persistent user-specific dismissal storage.
Displaying output inside activation callbacks
Activation callbacks should perform initialization tasks, not directly print notification HTML. Use a transient or another appropriate state-storage mechanism to display a message after the activation redirect.
Ignoring output escaping
Never assume that dynamic messages are safe simply because they appear inside the administration dashboard.
Use appropriate escaping functions and validate untrusted data.
Displaying too many notifications
Too many notices can overwhelm administrators and make important information difficult to identify.
Display notifications only when they are useful and relevant.
Using outdated notification implementations unnecessarily
For plugins supporting WordPress 6.4 and later, consider using wp_admin_notice() instead of manually generating repeated notice markup.
If older WordPress versions are supported, provide a compatible fallback.
15. Best Practices for Professional WordPress Plugin Development
A good notification system should be reliable, understandable, secure, and consistent with the WordPress administration interface.
Consider the following recommendations when developing your plugin.
| Best practice | Benefit |
|---|---|
| Use standard notice types | Maintains WordPress visual consistency. |
| Restrict notices to relevant screens | Reduces dashboard clutter. |
| Use dismissible notifications appropriately | Gives administrators more control. |
| Store persistent dismissal states | Prevents unwanted repeated messages. |
| Escape dynamic output | Reduces security risks. |
| Use transients for temporary messages | Supports notifications after redirects. |
| Use reusable functions or classes | Improves code organization. |
| Provide actionable links | Helps administrators resolve problems. |
| Support internationalization | Makes the plugin easier to translate. |
| Test different user roles | Helps prevent permission-related problems. |
It is also important to test notifications on different WordPress administration screens.
For example, a plugin should be tested with:
- The main WordPress Dashboard.
- Plugin settings pages.
- Posts and Pages administration screens.
- The Gutenberg editor.
- Different administrator and editor accounts.
One additional consideration is that the block editor has its own notification system. Traditional PHP notices are not always the appropriate mechanism for displaying notifications within the editor interface.
For editor-specific notifications, developers should consider the WordPress Block Editor Notices API.
Following these practices helps create notification systems that feel like a natural part of WordPress rather than an unrelated interface added by a plugin.
Conclusion
Custom admin notices are an essential feature of professional WordPress plugin development. They help administrators understand what is happening inside a plugin, identify configuration problems, receive operation confirmations, and take corrective actions when necessary.
WordPress provides several ways to implement these notifications, including the admin_notices action hook, standard notice CSS classes, and the newer wp_admin_notice() function introduced in WordPress 6.4.
Developers can also use transients to display messages after plugin activation, user-specific options to remember dismissed notifications, and reusable PHP classes to manage multiple messages across different plugin components.
However, implementing admin notices correctly requires more than simply displaying a message. Developers should consider notification visibility, user permissions, output escaping, dismissal behavior, internationalization, and compatibility with different WordPress versions.
By following the techniques explained in this guide, you can build a reliable notification system that improves the administration experience and makes your WordPress plugin easier to manage.
Whether you are developing a simple utility plugin, an advanced WordPress management tool, or a commercial plugin with multiple configuration screens, well-designed admin notices can make your software more understandable, maintainable, and user-friendly.
Frequently Asked Questions (FAQs)
1. What are custom admin notices in WordPress?
Custom admin notices are notification messages displayed inside the WordPress administration dashboard. Plugins use them to communicate successful operations, errors, warnings, configuration requirements, and other important information.
2. Which WordPress hook is used to display admin notices?
The admin_notices action hook is commonly used to display custom notifications in the WordPress administration area.
Example:
add_action(
    'admin_notices',
    'myplugin_display_notice'
);
3. How can I create a success notice in a WordPress plugin?
Use the notice-success CSS class or the wp_admin_notice() function with the success type.
wp_admin_notice(
    'Settings saved successfully.',
    array(
        'type' => 'success'
    )
);
4. How do I make WordPress admin notices dismissible?
Add the is-dismissible CSS class to your notice markup or use the dismissible argument with wp_admin_notice().
wp_admin_notice(
    'Your plugin is ready.',
    array(
        'type'        => 'success',
        'dismissible' => true
    )
);
5. How can I display admin notices only on my plugin settings page?
Use get_current_screen() to identify the current administration screen. Compare its ID with your plugin settings page ID and display the notification only when they match.
6. How can I display an admin notice after plugin activation?
Use a WordPress transient to store a temporary activation message. Retrieve and display that message through the admin_notices hook after WordPress completes its activation redirect.
7. Does WordPress automatically remember dismissed admin notices?
No. The standard is-dismissible class provides a dismissal interface but does not permanently save the dismissal state. Use user-specific options or another appropriate storage mechanism if you want to remember dismissed notifications.
8. What is the difference between wp_admin_notice() and admin_notices?
admin_notices is a WordPress action hook that determines when administration notices are displayed. wp_admin_notice() is a function that generates and outputs a notice using standardized WordPress markup.
9. Can custom admin notices contain HTML links?
Yes. Admin notices can include permitted HTML elements, including links. Use appropriate escaping functions, such as esc_url(), when generating dynamic URLs.
10. Which WordPress version introduced wp_admin_notice()?
WordPress 6.4 introduced wp_admin_notice() and wp_get_admin_notice(). Developers supporting older WordPress versions should provide a compatible implementation using the traditional admin_notices hook.